Maya - Model UVs
Preparing a Model for Textures + Materials
For general info on UVs, see Intro to UVs.
Basic UV Handling in Maya
Like most concepts in 3D Animation, UVs can get fairly complicated. So for simplicity sake, we'll show the most basic form of UV handling one can do.
This method won't give amazing UV results, but it should be passable enough for beginners to at least experiment with later stages in the pipeline, such as texturing and materials.
Be aware that this method will probably give us unexpected bumps and artefacts, particularly if using Substance Painter and Smart Materials.
For more advanced UV handling, see the below external references.

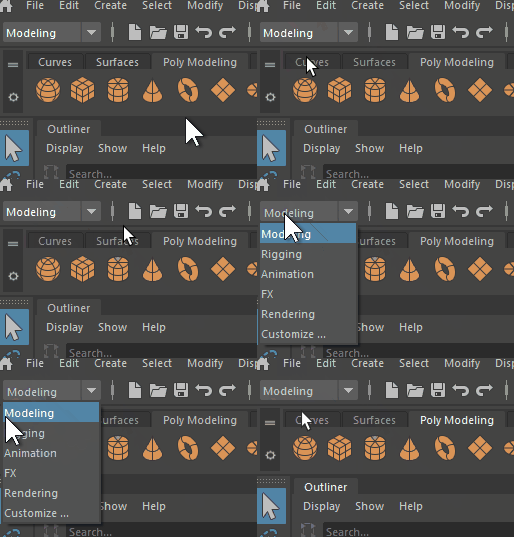
First, we need our main menu bar to be in Modeling mode.
This is the default for Maya, but if not, use the dropdown in the top-left to change it now.

Next, go into Object Selection Mode and select the entire model you wish to change the UV's for.
This is important, as Maya only lets us update UV's for the currently selected object.
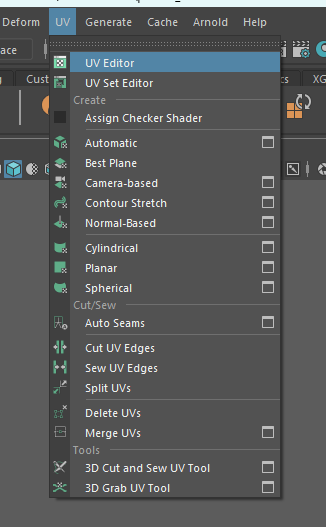
With our object selected, we can go to the menu > UV > UV Editor.

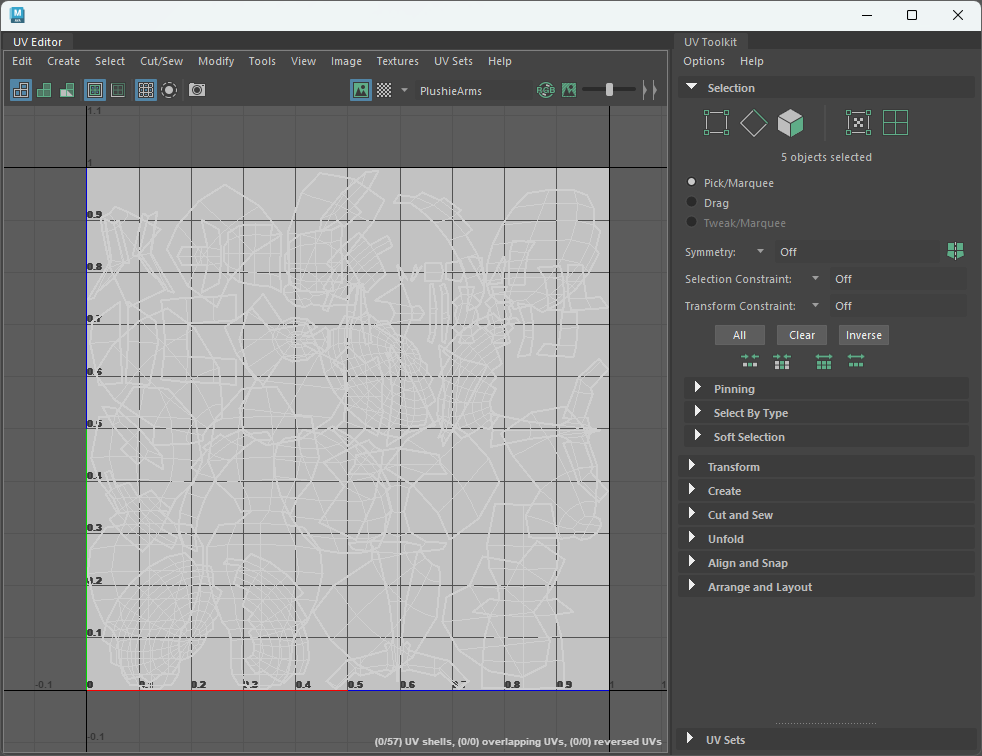
The above step should open up a new window, that probably looks something like the image to the left.
The center area is our model's edges and faces, mapped to a flat 2D image. Ideally, we want this to be clean and organized, so we can easily understand what our textures are doing when we get to that step.
However, most likely, our model UVs opened up to some crazy abomination that is unrecognizable.
The more complicated our model, the more messy this screen is likely to look. Similar to the example shown.

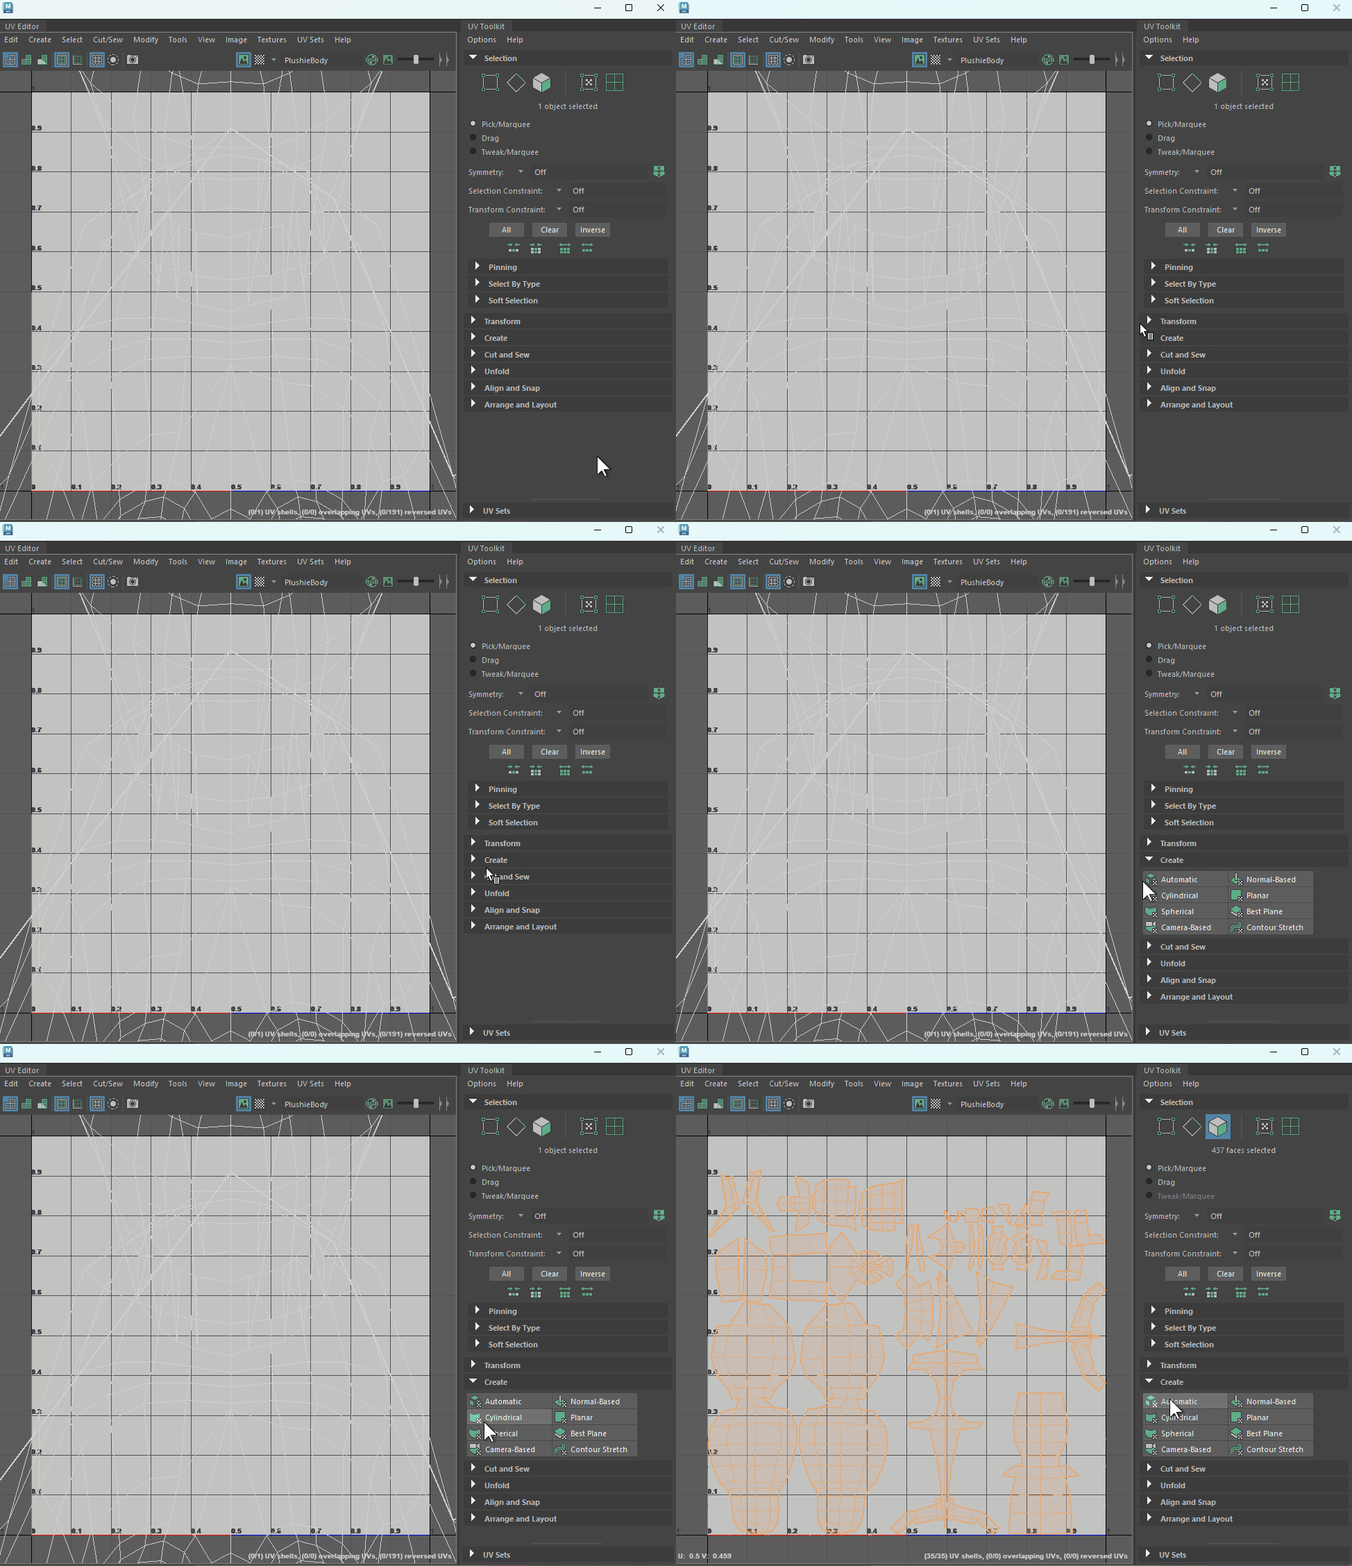
Regardless of how our UVs start off looking, we can look at the tabs on the right of this window.
The most straightforward option is to open up Create, then select Automatic.
This should instantly and automatically try to remap all of our UVs to something that is recognizable.
Again, the resulting UVs probably won't be perfect, but they will hopefully be "good enough" for a beginner to get started with texturing. For more details on more advance UV handling, see the below "External Reference" videos.
