Maya - Creating the Final Render
Finishing a Scene in Maya
This page assumes we have completed the prerequisites for rendering a scene.
This page also assumes we are rendering multiple frames for a gif/mp4 output.
Creating the Final Render
Before we take the time to render out all our frames, we can open up the Arnold Render window to verify everything looks correct. This includes moving through our animation keyframes to verify multiple spots of our animation look correct, not just the first frame.
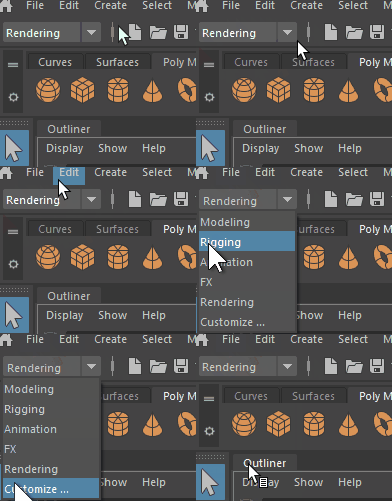
Once happy with how it looks in Maya, we can attempt to render the full sequence. If it’s not already, change the menu to “Rendering”.
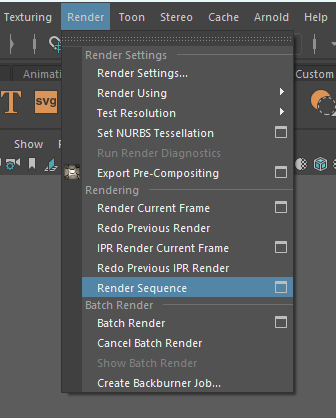
In this menu, go to Render > Render Sequence. Make sure to hit the options box.
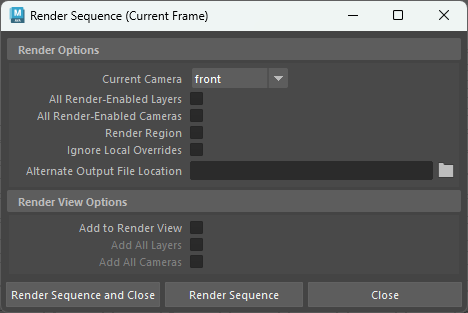
A new window will pop up. In general, we can leave most of these options as the defaults. However, we do want to make sure the “Current Camera” option is set to the desired camera in our scene.
When ready, we can hit “Render Sequence”.
At this point, Maya will render all images as indicated by our render settings.
Depending on the complexity of the scene, this might take under a minute for simple scenes, or multiple hours for complex scenes.
When it's done, the final output image sequence will be located in the folder specified for our render settings. By default, this is the maya project "images" folder.
Converting Image Sequences to an Animated/Movie Format
For this example, we'll import into Adobe Premier Pro, which allows us to arrange our image sequence onto a “timeline” and output to various animated file types.
We start by opening a new project in Adobe Premier Pro. After creating a project, we should see three tabs in the top-right: Import, Edit, and Export. For now, we want to start with the Edit tab.
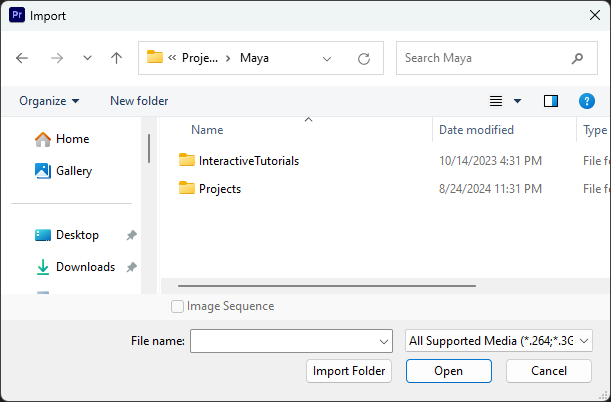
From the menu at the top, select File > Import.
Here, we want to navigate to the folder of our Maya render images. Then select the first image in the folder, and ONLY the first image.
We can check the "Image Sequence" checkbox, and then click "Import" to finalize our selection.
Adobe Premier Pro is smart enough to detect and include all images with a similar naming structure in the folder, as long as the images end in a sequential number pattern.
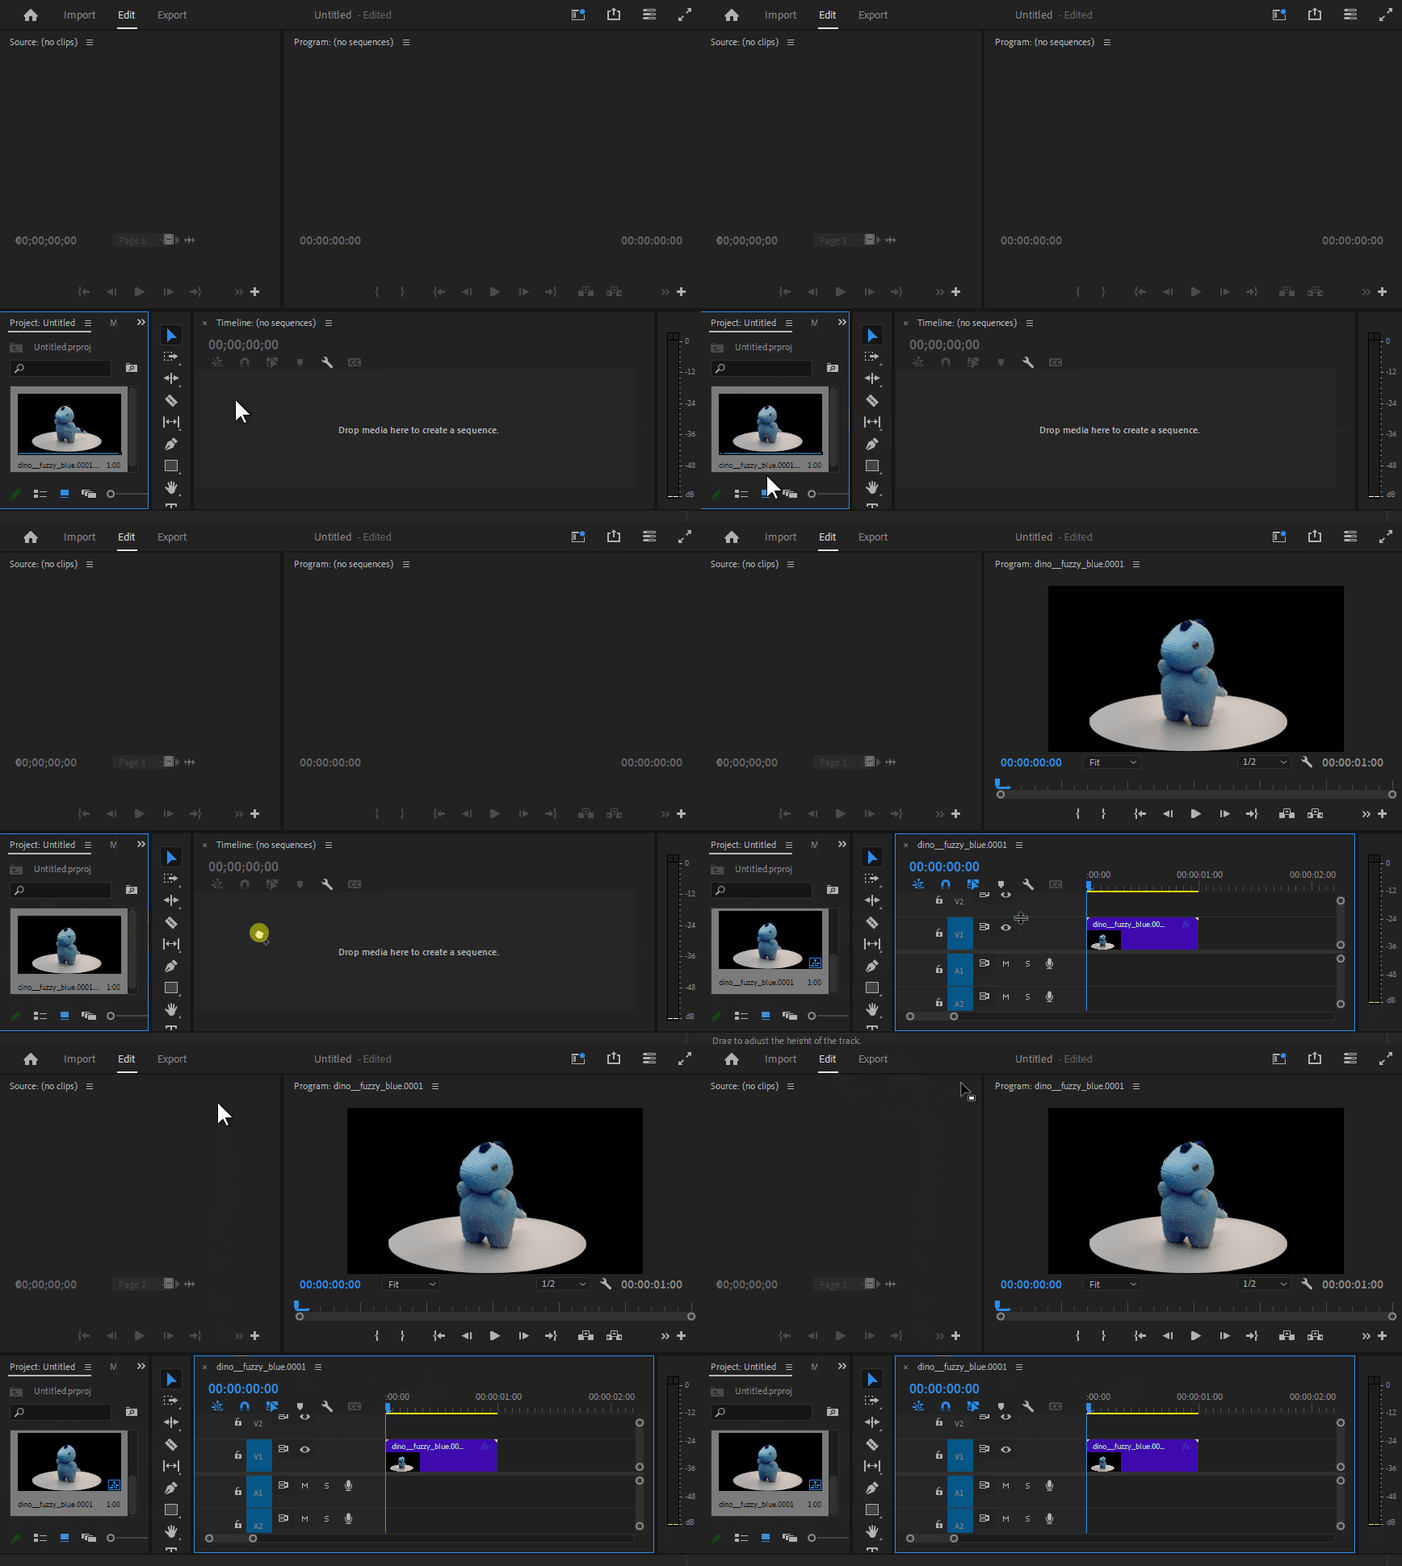
At this point, we should have a thumbnail in the bottom left for our image sequence. Drag it into the timeline (the bottom-right area in the default layout).
We can then go to the export view by either clicking "Export" at the top of the window, or by using the keyboard shortcut Ctrl + M.
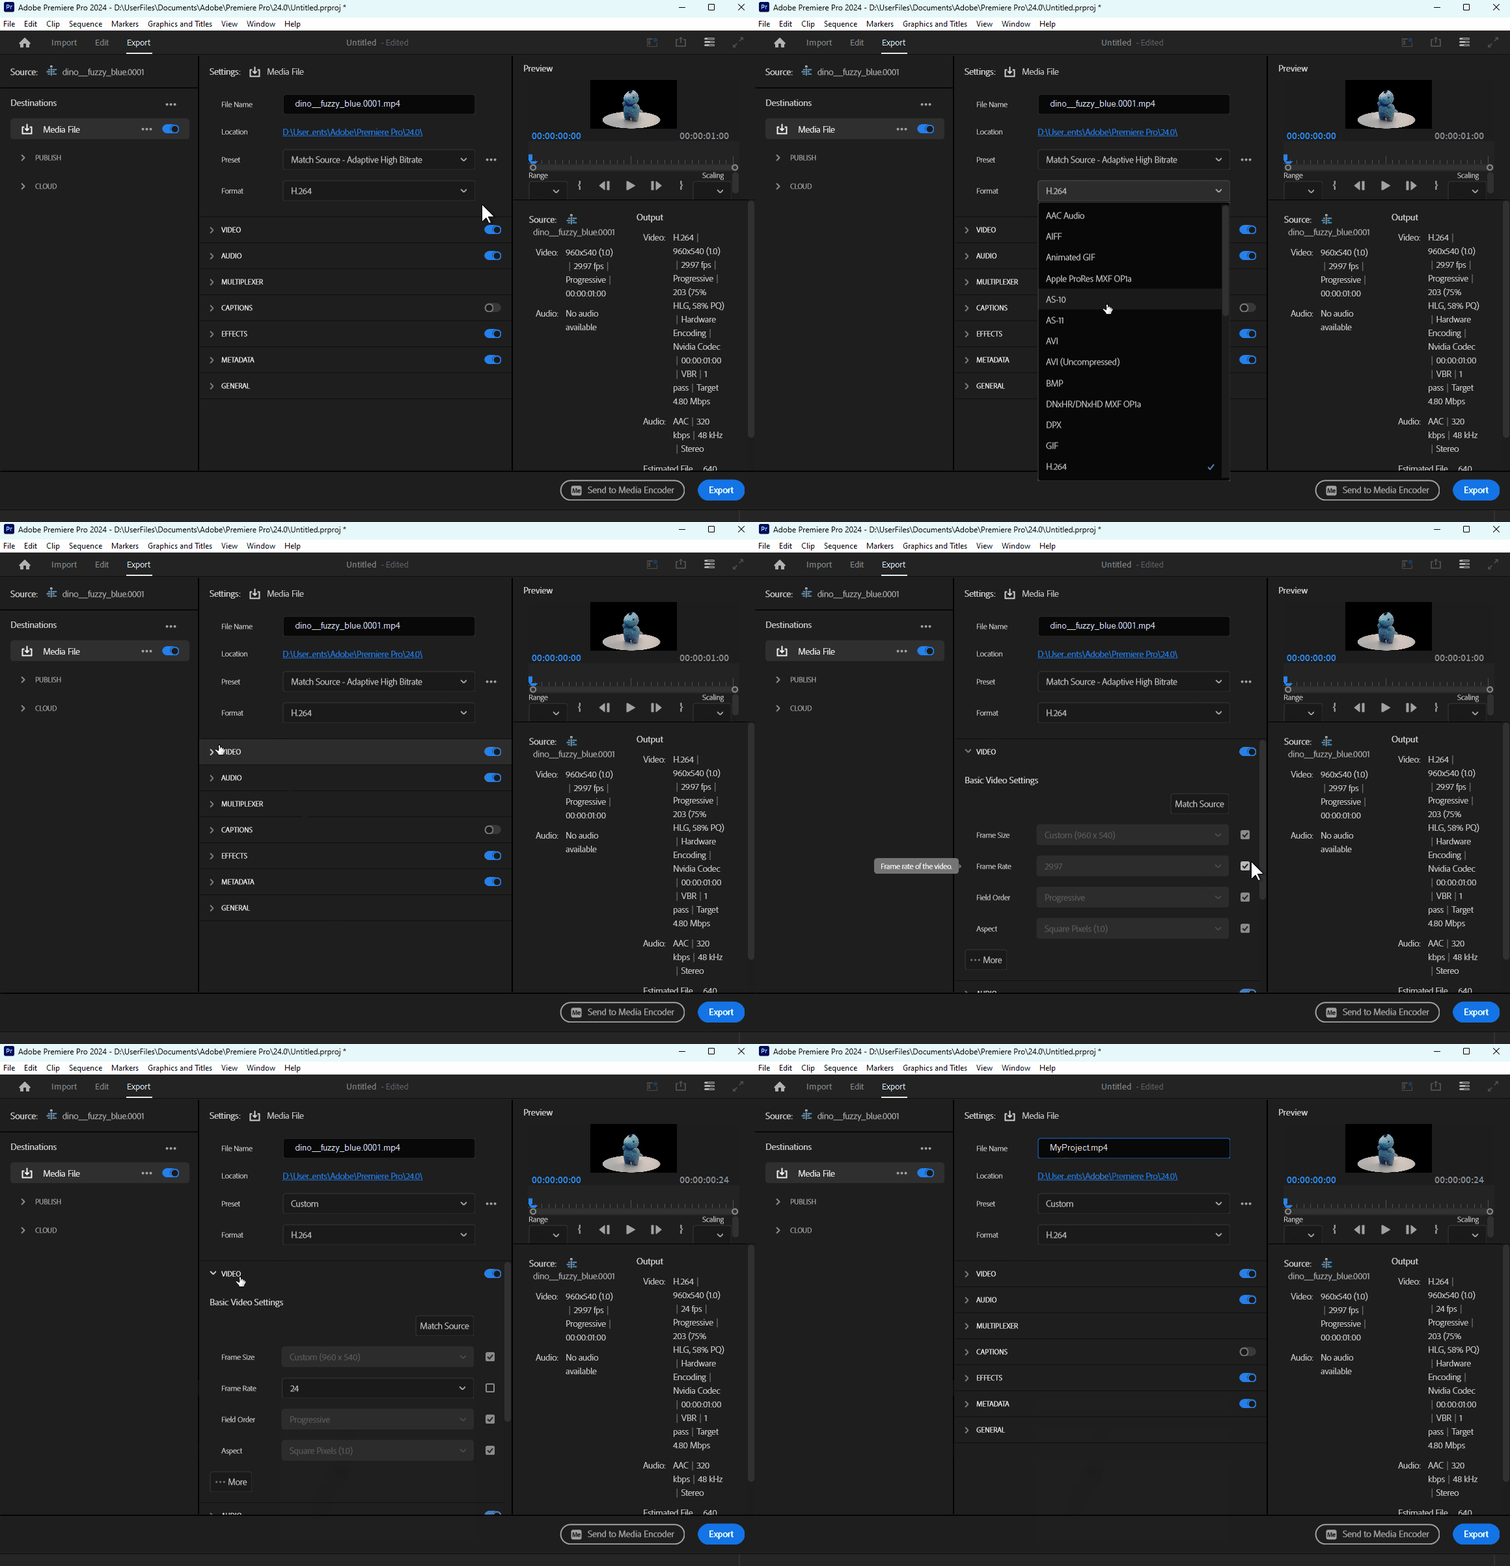
Here, we have a new view that allows us to select various properties for our final product.
This includes sections like the Format dropdown to select file type, such as gif or mp4. Or the Video dropdown to select properties such as "frame size" or "framerate."
NOTE: The options "gif" and "animated gif" are two separate options here, with only the second one resulting in an actual moving output.

Once the options are set to your liking, and everything seems correct, on the bottom right hit "Send to Media Encoder."
Once again, a new window will open up. On the top-right of this new window will be a green arrow. We can click this button to actually generate our new files.
Take note of where it says it's saving to, or click the file path to open up the location where it's been saved.

