Maya - Rendering Settings
Finishing a Scene in Maya
Opening the Render Settings Window
The easiest way to open the Render Settings Window is to use the icon at the top-middle of the screen.
There is a section of icons that look like "clapperboards", or "film clappers", used in real-life movie making.
The one we want is the clapper icon with a cogwheel on it.
Render Settings Overview
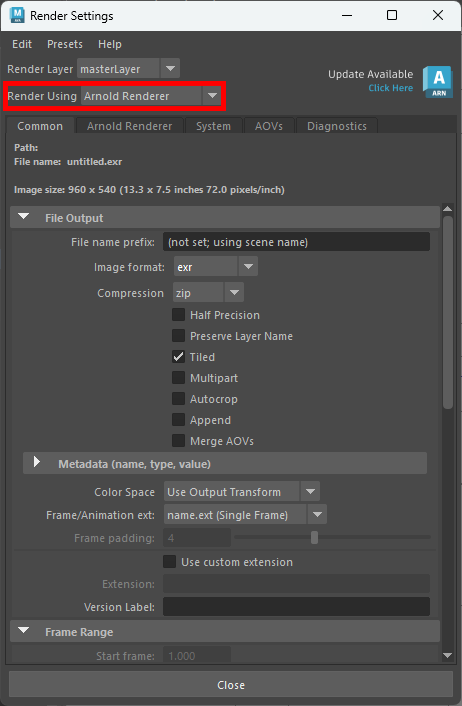
For this site, we assume use of Arnold Renderer.
If our renderer is set to anything else, we can change it with the second topmost dropdown in this window.
If Arnold is NOT showing up, then we need to enable the Mtoa plugin in the Maya plugin window.
Main Render Settings Tabs
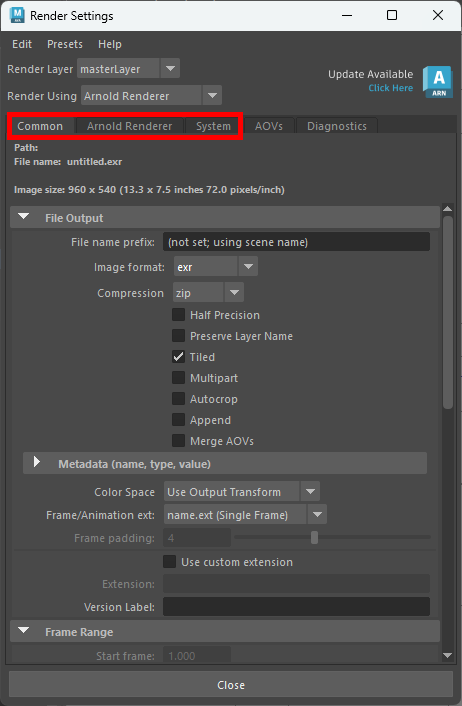
For our purposes, the first three tabs are by far the most important.
That is, the Common, Arnold Renderer, and System tabs.
These tabs are described in further detail below.
Common Settings - "Common" Tab
This is where a majority of our relevant settings exist, particularly most settings that are only relevant when creating the final render.
Common - File Name
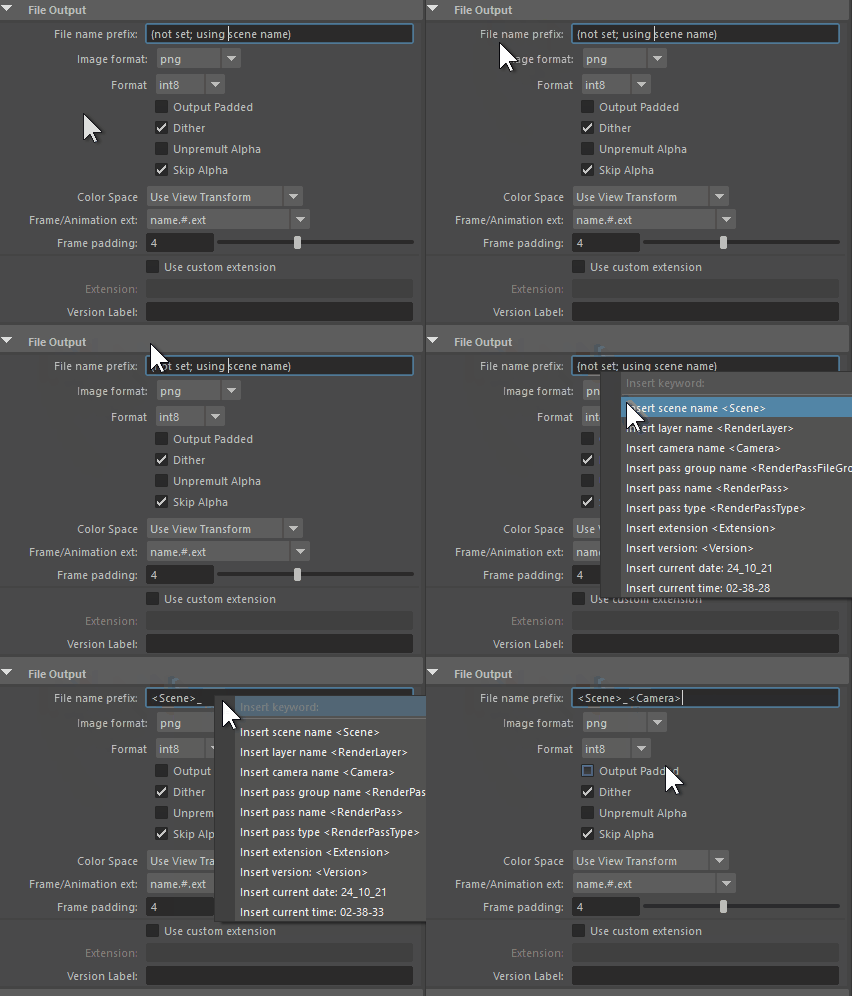
The File name prefix setting controls the majority of our file output name, when creating our final render outputs.
We can right-click to get a menu of options that will auto-populate our final file name, based on various project settings.
If using values from this right-click menu, it's recommended to have at least one character in-between, such as an underscore in our example.
Speaking of our example, we output the scene name, followed by the name of the render camera.
Common - File Output
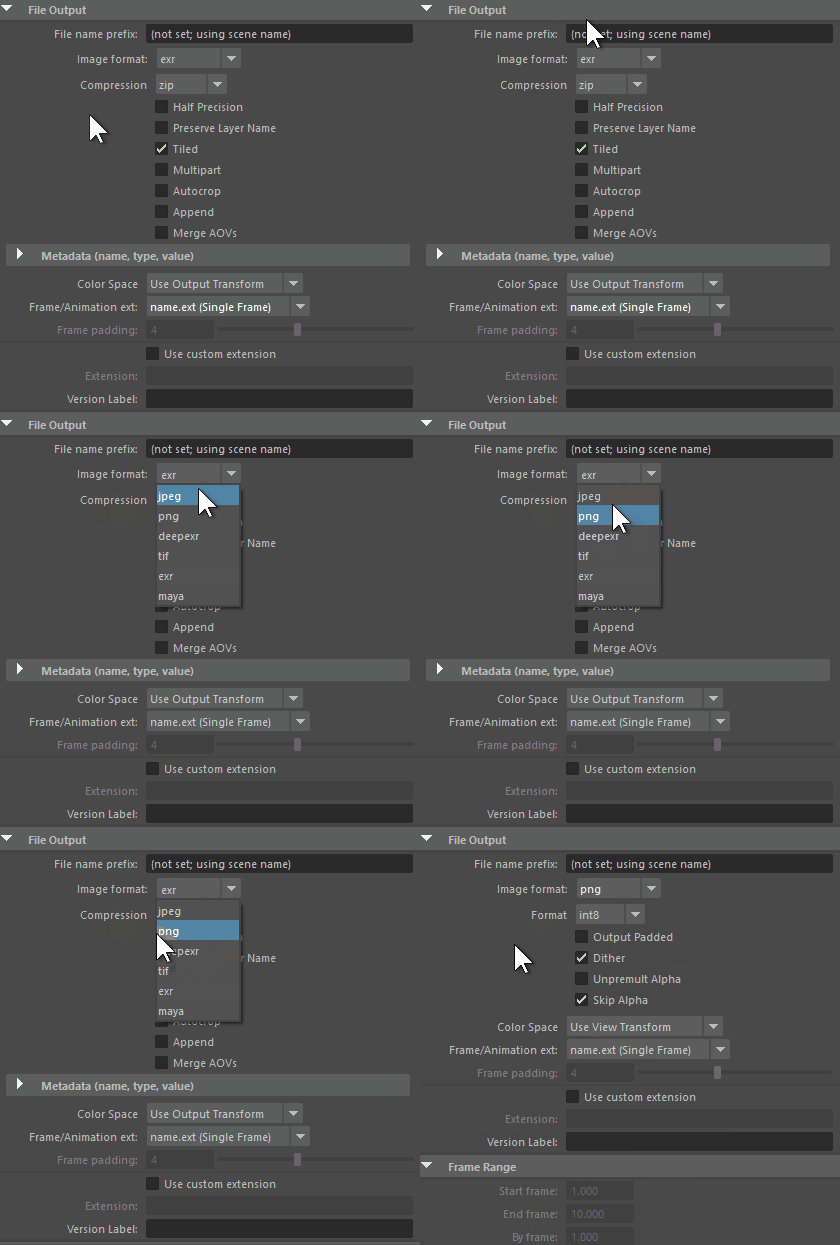
The Image Format setting controls what file type Maya outputs as when creating our final render outputs.
For our purposes, we probably want png or jpg. The png file type tends to be associated with higher quality, so that's likely the safer choice.
Common - Frame Ext
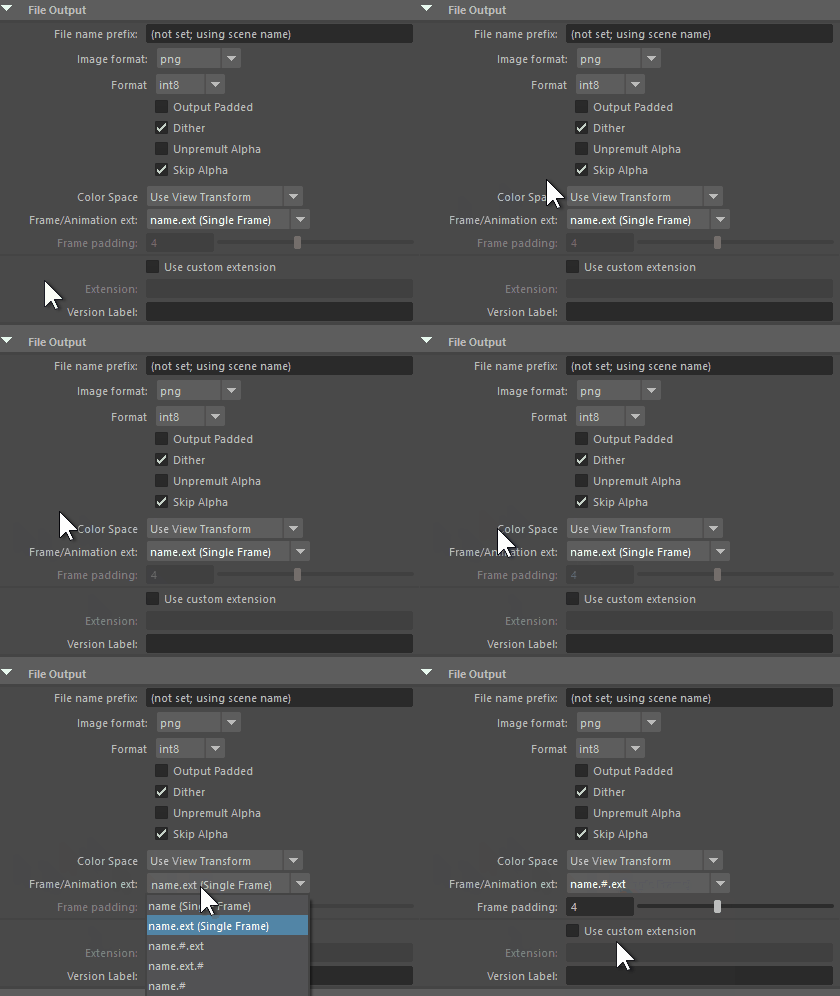
Presumably, most of the time we create a final render, it is meant to be an animated file type such as a gif or mp4.
The Frame/Animation ext lets us specify that, and change the output file name.
A solid choice is the name.#.ext. This specifies that we use the "File name prefix" value, then the "current frame number", and finally the "Image format" value.
Common - Frame Range
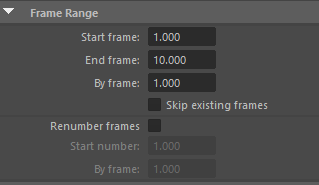
If rendering an animation, the animation will have a starting and ending frame. We should set these to whatever those starting/ending frame values are. It will depend on the animation.
We also have the Skip existing frames option, which can be useful if Maya crashes. By checking this, Maya will skip trying to render any frames that already exist.
Common - Image Size
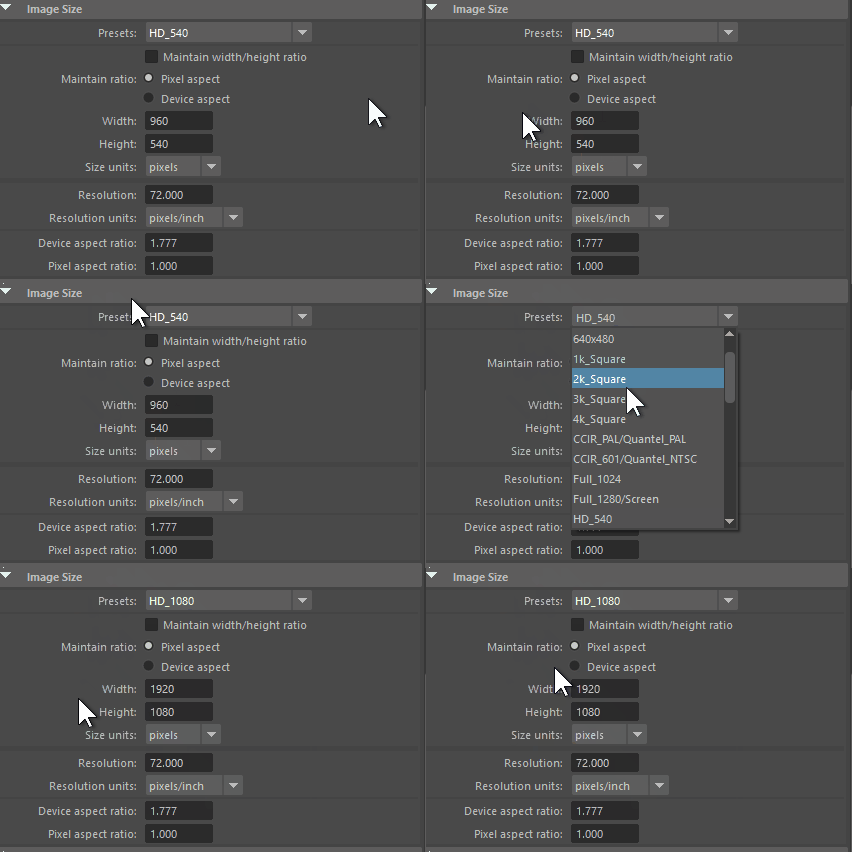
The Image Size section controls the final image size of our output render files.
That is, each png, jpg, etc file we render will have the corresponding height, width, and resolution.
Some good, easy presets are the HD_520 (which is the default), or HD_1080 (which is exactly twice as large as the default).
Common Settings - "Arnold Renderer" Tab
These tend to be settings that control the quality of our rendering, which is relevant any time we're creating render output. Both for previewing and for our final renders.
Arnold Renderer - Sampling
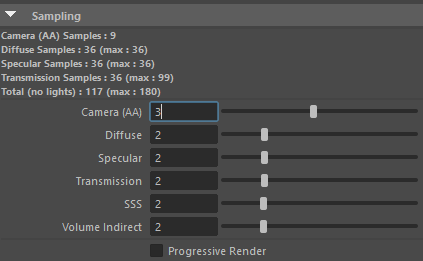
If rendering with CPU, then this is the primary way to adjust render quality settings.
Otherwise if using GPU, then see "Ray Depth" below.
Each value here controls the number of sampled light bounces per type of light ray.
The final sample counts display at the top of this box, and more samples directly correspond to longer render times.
-
Camera (AA) - Controls the overall quality of the render.
This value multiplies all other values, so it directly affects everything. -
Diffuse - This is effectively the "general lighting" across surfaces, and will affect the quality of most lighting.
-
Specular - This affects the lighting for the brightest highlights on surfaces, and may affect some reflective/shiny sufaces in general.
-
Transmission - This affects lighting for surfaces that are partially or fully transparent, such as glass-like surfaces.
-
SSS - This stands for "Subsurface Scattering", and affects any materials with a subsurface material value.
This will generally be things like skin or wax. -
Volume Indirect - This affects lighting for surfaces with indirect lighting coming from (or through) a volume, such as fog, mist, or dust particles.
Generally speaking, you'll know if you have volume lighting, because volumes are entities you specifically have to add to a scene.
Arnold Renderer - Adaptive Sampling

Adaptive Sampling is an optional setting that will selectively increase quality when required, in order to avoid pixelation and artefacts in the final renders.
This setting can be good for ensuring max quality, but can also make renders take significantly longer to complete.
Arnold Renderer - Ray Depth
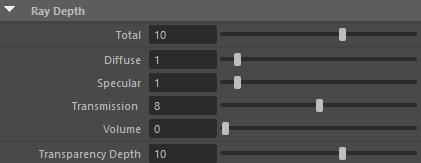
If rendering with GPU, then this is the primary way to adjust render quality settings.
Otherwise if using CPU, then see "Sampling" above.
-
Total - Controls the overall quality of the render.
This value multiplies all other values, so it directly affects everything. -
Diffuse - This is effectively the "general lighting" across surfaces, and will affect the quality of most lighting.
-
Specular - This affects the lighting for the brightest highlights on surfaces, and may affect some reflective/shiny sufaces in general.
-
Transmission - This affects lighting for surfaces that are partially or fully transparent, such as glass-like surfaces.
-
Volume - This affects lighting for surfaces with indirect lighting coming from (or through) a volume, such as fog, mist, or dust particles.
Generally speaking, you'll know if you have volume lighting, because volumes are entities you specifically have to add to a scene.
Common Settings - "System" Tab
For our purposes, there's only one relevant setting here, but it's fairly important.
System - Render Device
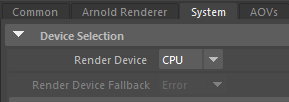
This controls if we're rendering with our CPU or GPU.
Using a GPU will frequently be faster, but it depends on your computer hardware.
Laptops and low-end devices often won't have a dedicated GPU, or will have a weak GPU. In which case the CPU might be better.
However, most medium to high-end computers now will have a good GPU, particularly gaming computers. When using one of these devices, you're almost always going to be better off using the GPU.
WARNING: There are a few tasks in Maya that physically cannot render in Arnold. Such as most VFx work will only render when using a CPU.