Maya - Bifrost
Creating VFX in Maya
Maya Bifrost
As of 2023, Maya's primary VFX tool is called Bifrost.
Warning: Bifrost has gone through multiple different versions over the past years. If you look up tutorials, you generally want ones that use the “Bifrost Graph Editor” and “Bifrost Nodes”. Anything else is most likely a bit outdated.
If you have newer versions of Maya, then the old stuff is probably not properly supported anymore and thus won't work. And even with “current” stuff, SAVE REGULARLY, IT WILL CRASH SOMETIMES.
Enabling Bifrost in Maya
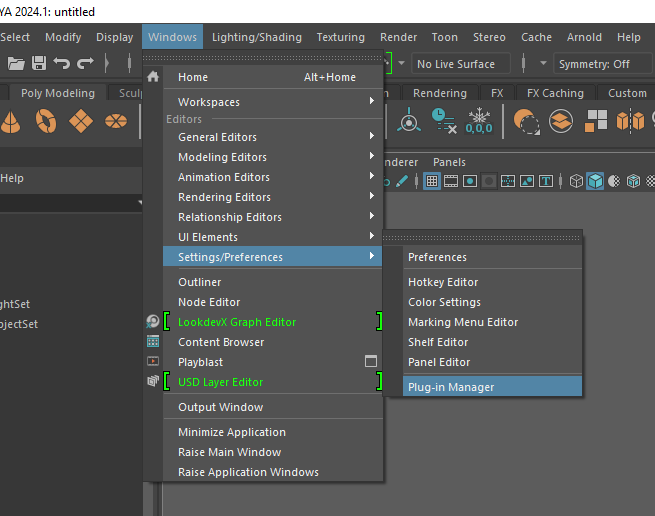
By default, Bifrost is not enabled in Maya. To enable it, open the Maya Plugin Manager window. This can be found at Windows > Settings / Preferences > Plug-in Manager.
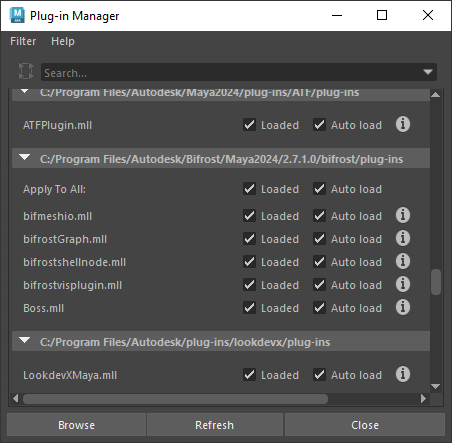
From here, scroll down to a section that includes Bifrost in the header. It will probably look similar to the screenshot.
Check which boxes are needed. If unsure, just check all the boxes. That means Maya will load a bit more than we'll use, but for learning purposes, that's probably okay.
Using Bifrost
With Bifrost now enabled, we should have a new menu option. We can go to Windows Bifrost Graph Editor to open up our node editor and actually do fun stuff!
Bifrost is “node based”. Where each node is visually represented as a panel with a series of input parameters and then one or more output values. Nodes are chained together in order to create the desired effect.
This all gets very complicated, very fast. And depending on what kind of effect you’re going for, the workflow will be slightly different. At least as far as Bifrost is concerned, there are four main things to keep in mind:
-
Emitter - The “emitter” is usually an object used as the base for how to spawn in your particles. In other words, you provide some model as a starting point, particles use the shape and location to spawn from.
Then physics / gravity will enact on this starting point and simulate from there.
-
Solver - The solver is what calculates all the physics/gravity effects. It will often contain many various attributes that can modify how calculations act on your particles between each frame.
-
Collider - A collider is one or more objects that your particles should “collide” and interact with. Think “water hitting the floor”, or “cloth laying on your character”.
-
Output - The output is the final result of all this complicated logic. More often than not, the output is a mesh generated from the location of the particles in any given frame. Because the particles are frame-dependent, this mesh will change from frame to frame as well.
For details of different types of Bifrost simulation, see the below videos under External References.
Bifrost Caching
By default when it runs, Bifrost will be very slow the first time it processes a frame, but then significantly faster in the future.
This is because Bifrost tends to do expensive calculations and then "cache" or save them to the hard drive.
To reset this cache data, we can go to our Maya project folder > Cache > vfx and then delete the files here.
Note: Because of how this VFX data is calculated, we can't skip frames at first. Before this cache data is created, we need to start at the beginning of the VFX animation and let Maya calculate each frame, in order. This cache data is only created for the frames that maya runs, so if we pause our animation early, then only some frames will have cache data until we resume.
