Hollowing Out Objects
Aka, Adding Thickness to Flat Objects
We can make intentional holes in our objects to "flatten" it into a 2-dimensional shell.
Then we can add thickness to this flattened shell to make it 3-dimensional again.
The same "thickness" concept also applies to any flat plane in zBrush that we wish to add 3-dimensionality to.
Flattening Objects By Creating Intentional Holes

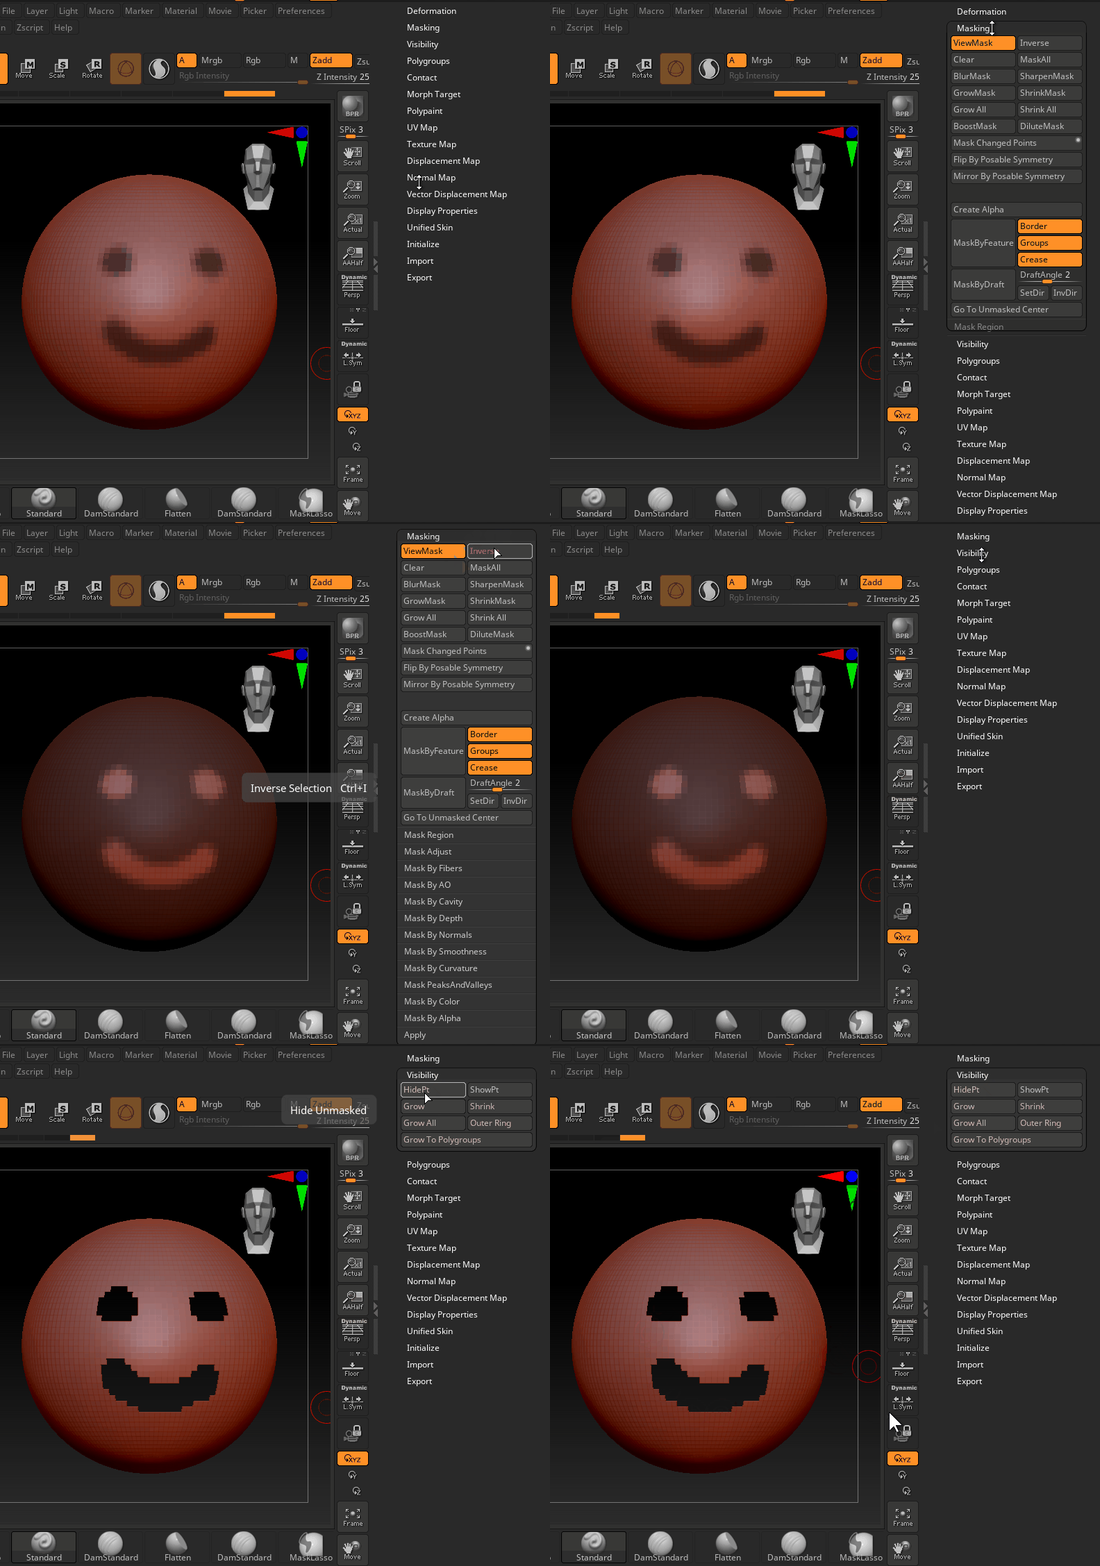
We can use concepts from zBrush masking to make a selection on our object. This selection should be in the shape we want to make holes of.
First we draw a mask, then we invert the mask. Finally, we mark as hidden.
This effectively keeps all of our shape visible, except for the section we drew with the intention of creating holes.
NOTE: We have only made sections of our sculpt hidden, these are NOT yet actual holes, even if it may look like it is.

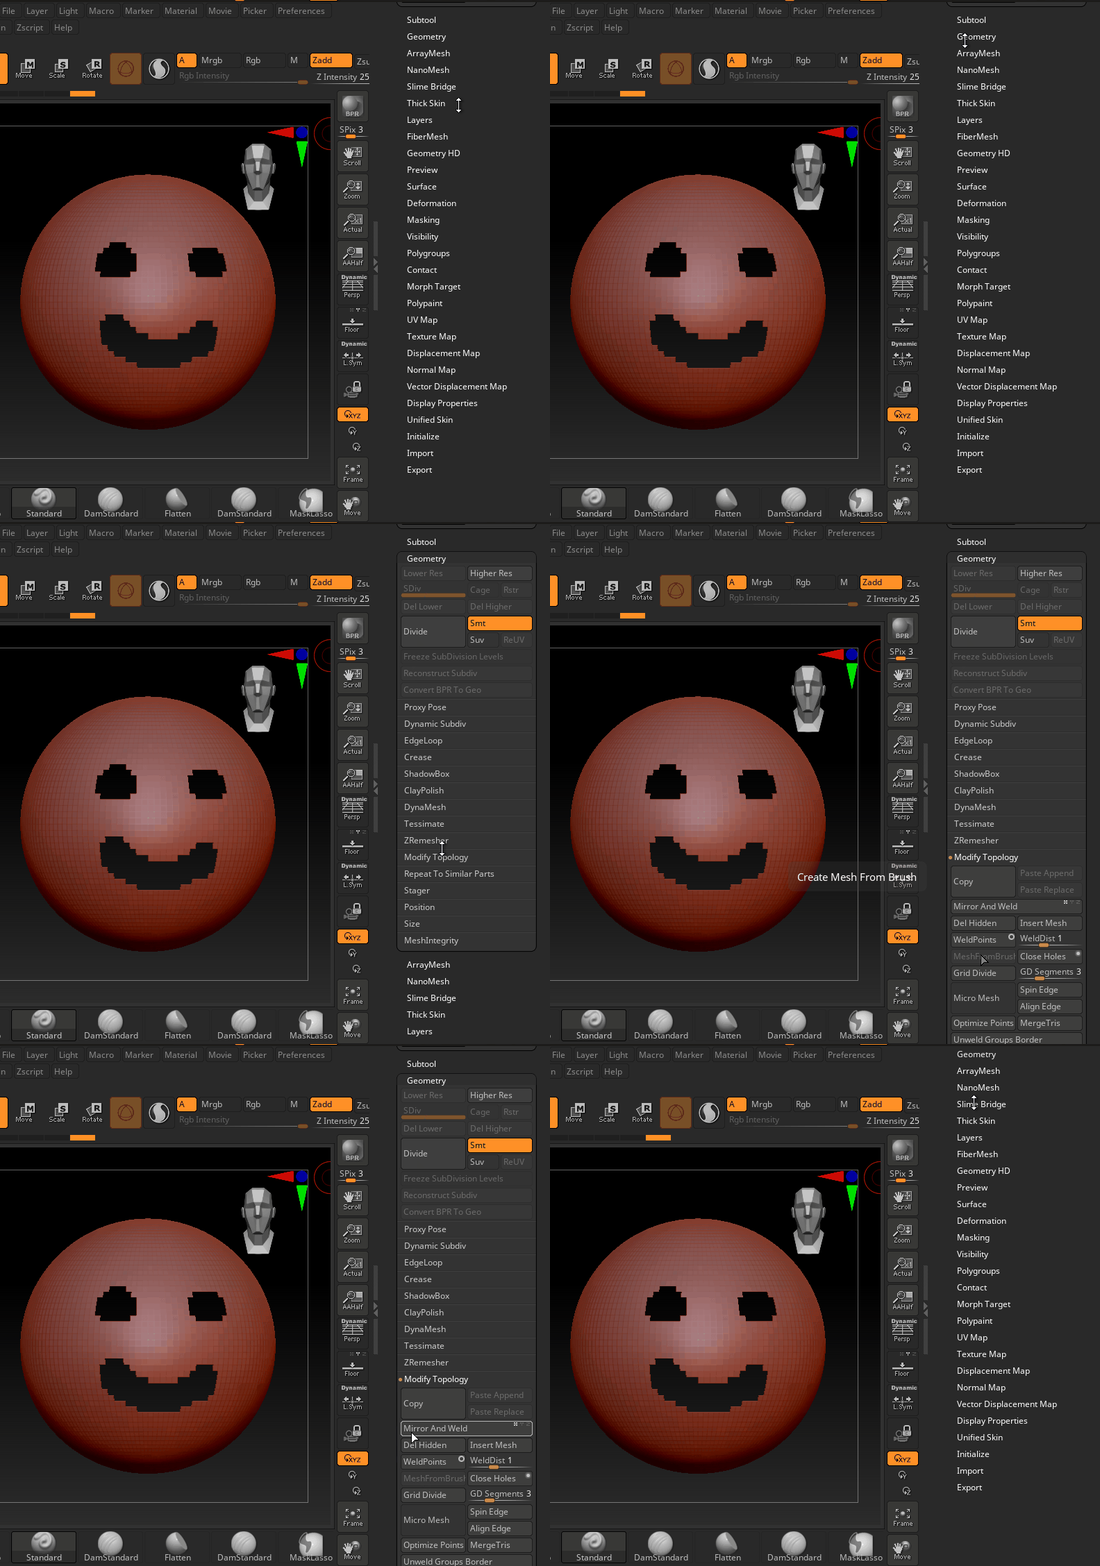
After completing the above steps, we can actually make our "hidden" section turn into holes.
We accomplish this by going to Geometry > Modify Topology > Del Hidden.
Now, we have one or more actual, legitimate holes in our sculpt.
The parts that are still there now consist of flat, one-sided planes with no inside-facing portion.
Adding Thickness to Flat Planes in zBrush

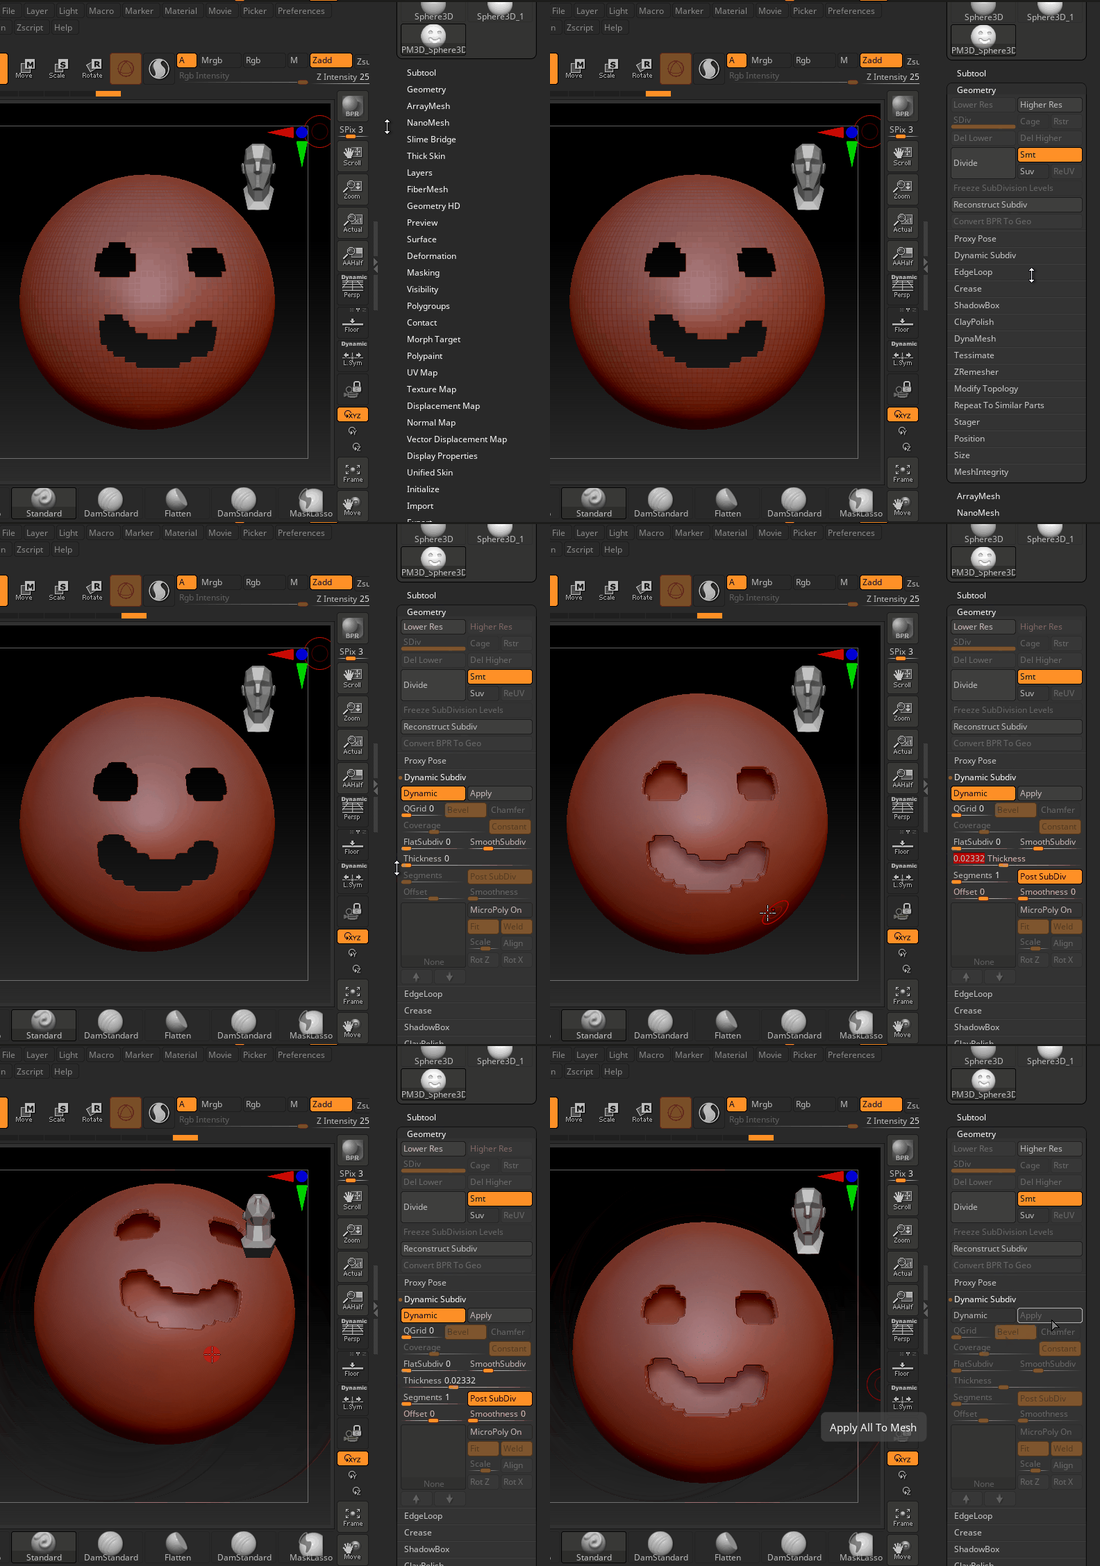
Once we have any flat plane, we can use the subdivision tool to add thickness, among other things.
Here, we go to Geometry > Dynamic Subdivision.
We click the Dynamic button to toggle a PREVIEW of the subdivision. Note that anything you do at this point is not actually yet applied to your model, zBrush is only displaying what it would look like if we choose to apply.
From here, we specifically care about the Thickness property. In the example to the side, a value around 0.02 to 0.03 gives a good thickness that isn't too little or too much.
Once happy with the preview, we can hit Apply to make the changes permanent to our sculpt.