
zBrush - Masking and Polygroups
N/A
Masking
Masking is very useful in sculpting.
It allows setting parts of your model as uneditable, so that you can work on nearby areas without modifying the original section.
As we'll see below, masking is also used to create polygroups, which is very useful as well.
See the section on zBrush Mask Actions for information on what masking key shortcuts are available.
See the section on zBrush Masking Brushes for information on what masking brushes are available.
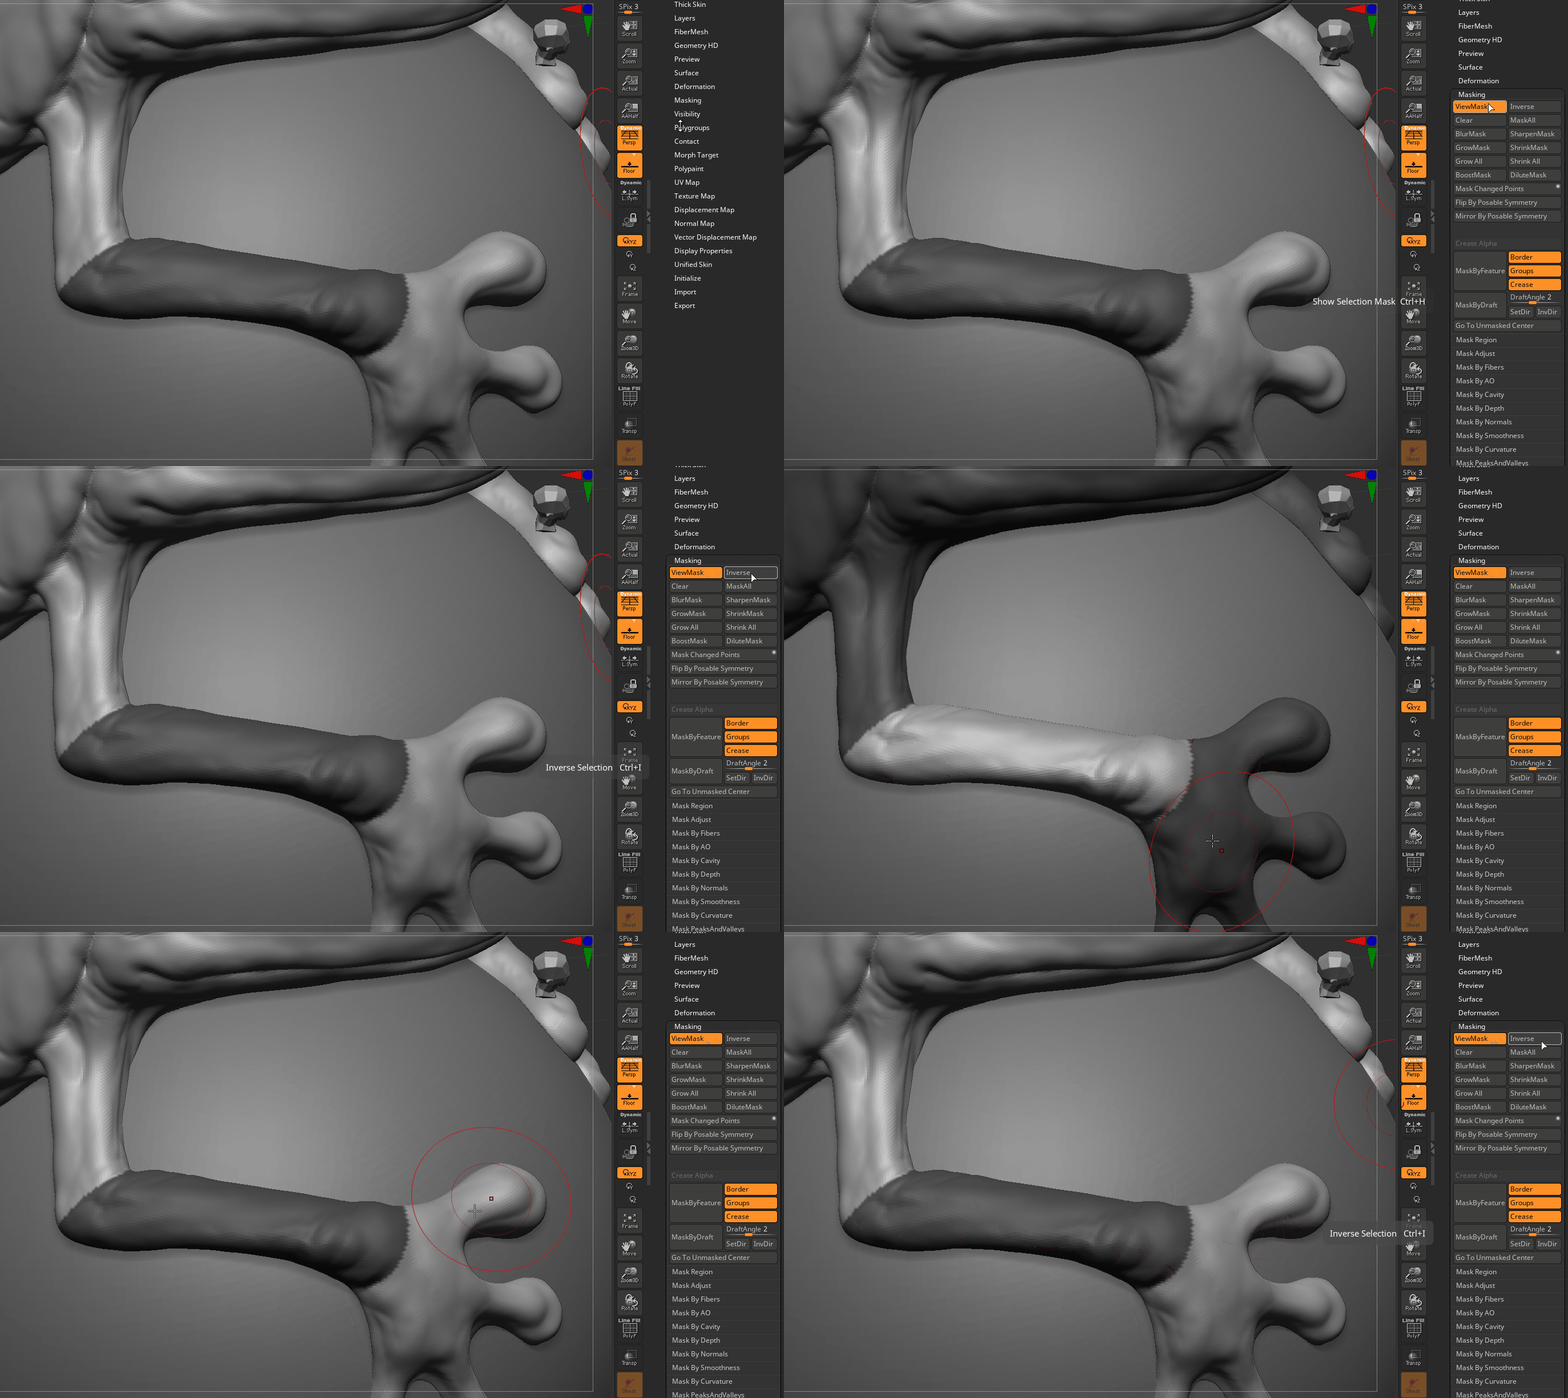
It's possible to invert the current mask by going to the Toolbar > Masking > Inverse.
Alternatively, you can use the shortcut of Ctrl + Left Click anywhere outside of the model.
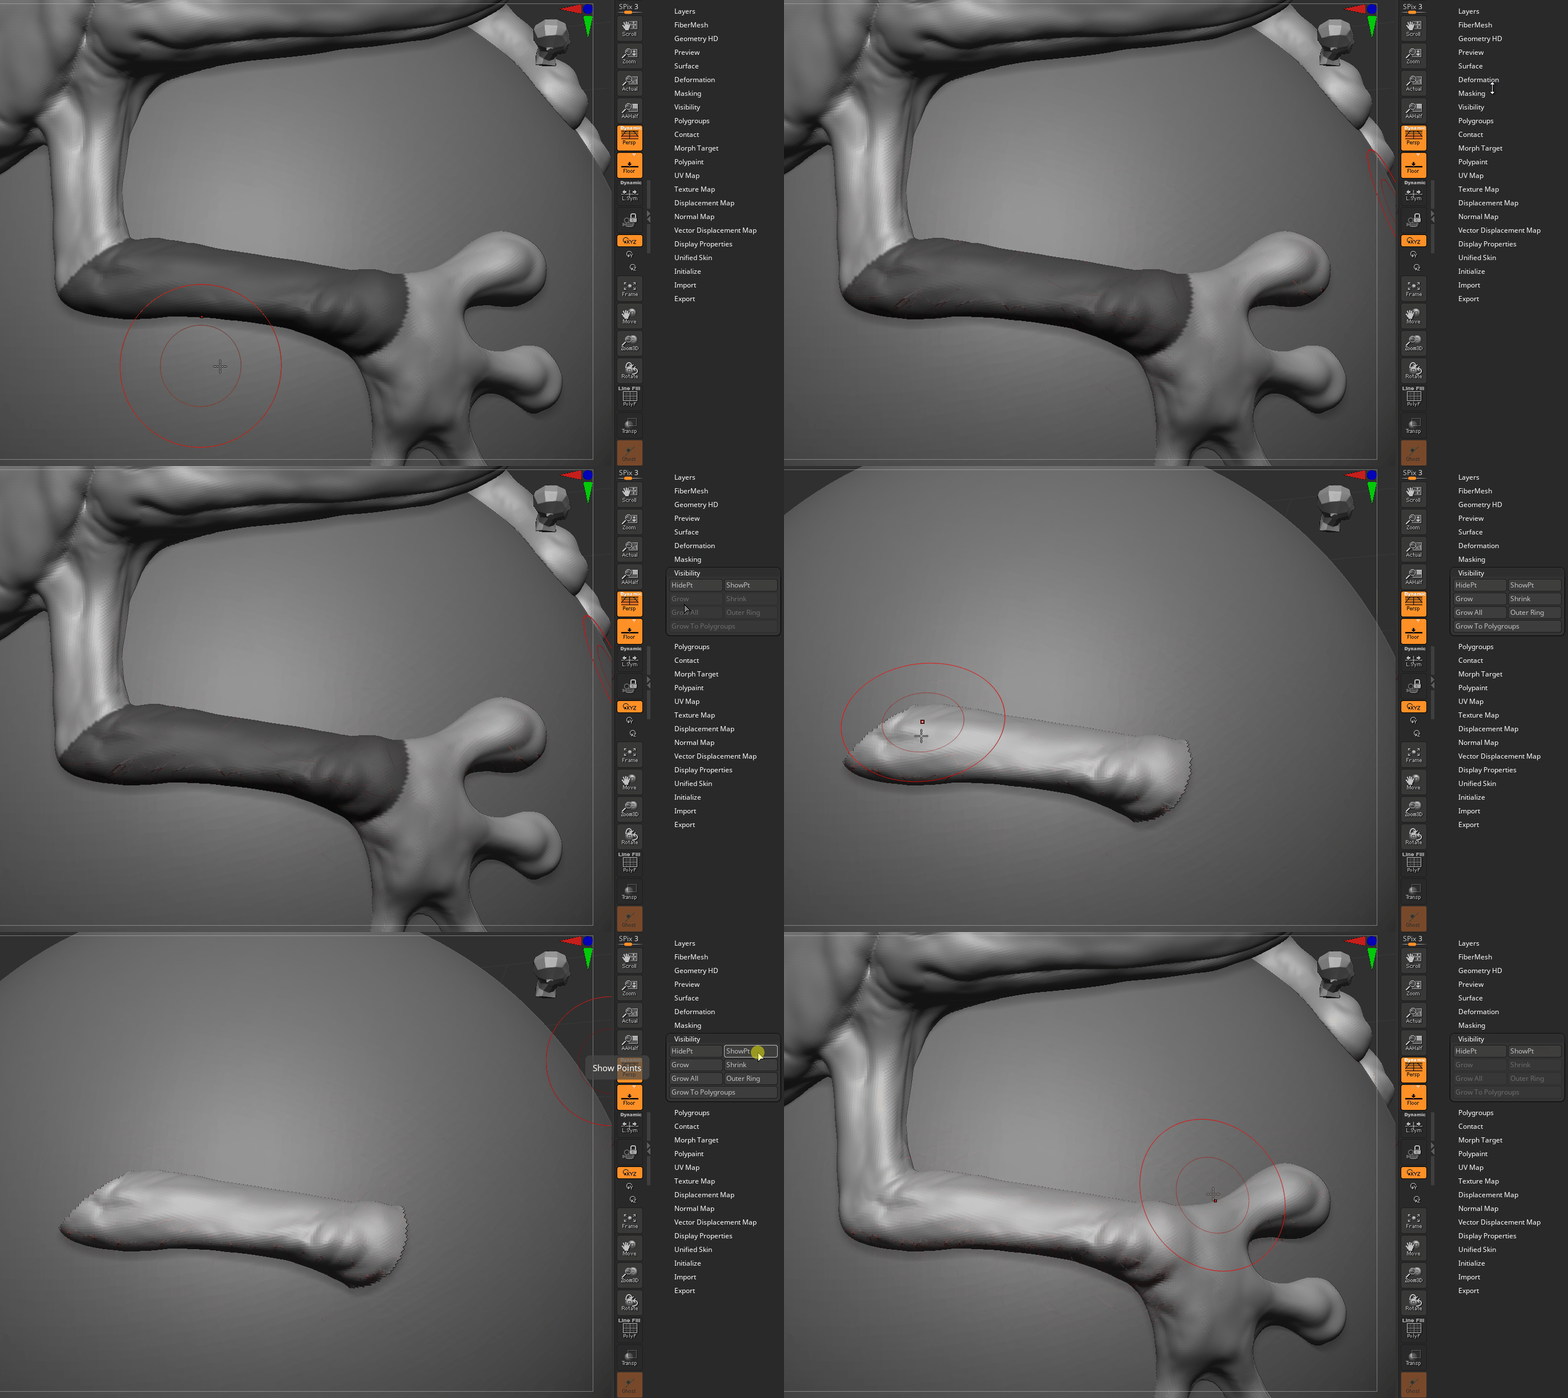
Once a mask is present, it can be used to hide parts of the model.
From the Toolbar, go to Visibility > HidePt to hide the unmasked parts of the model. Use ShowPt to show it again.
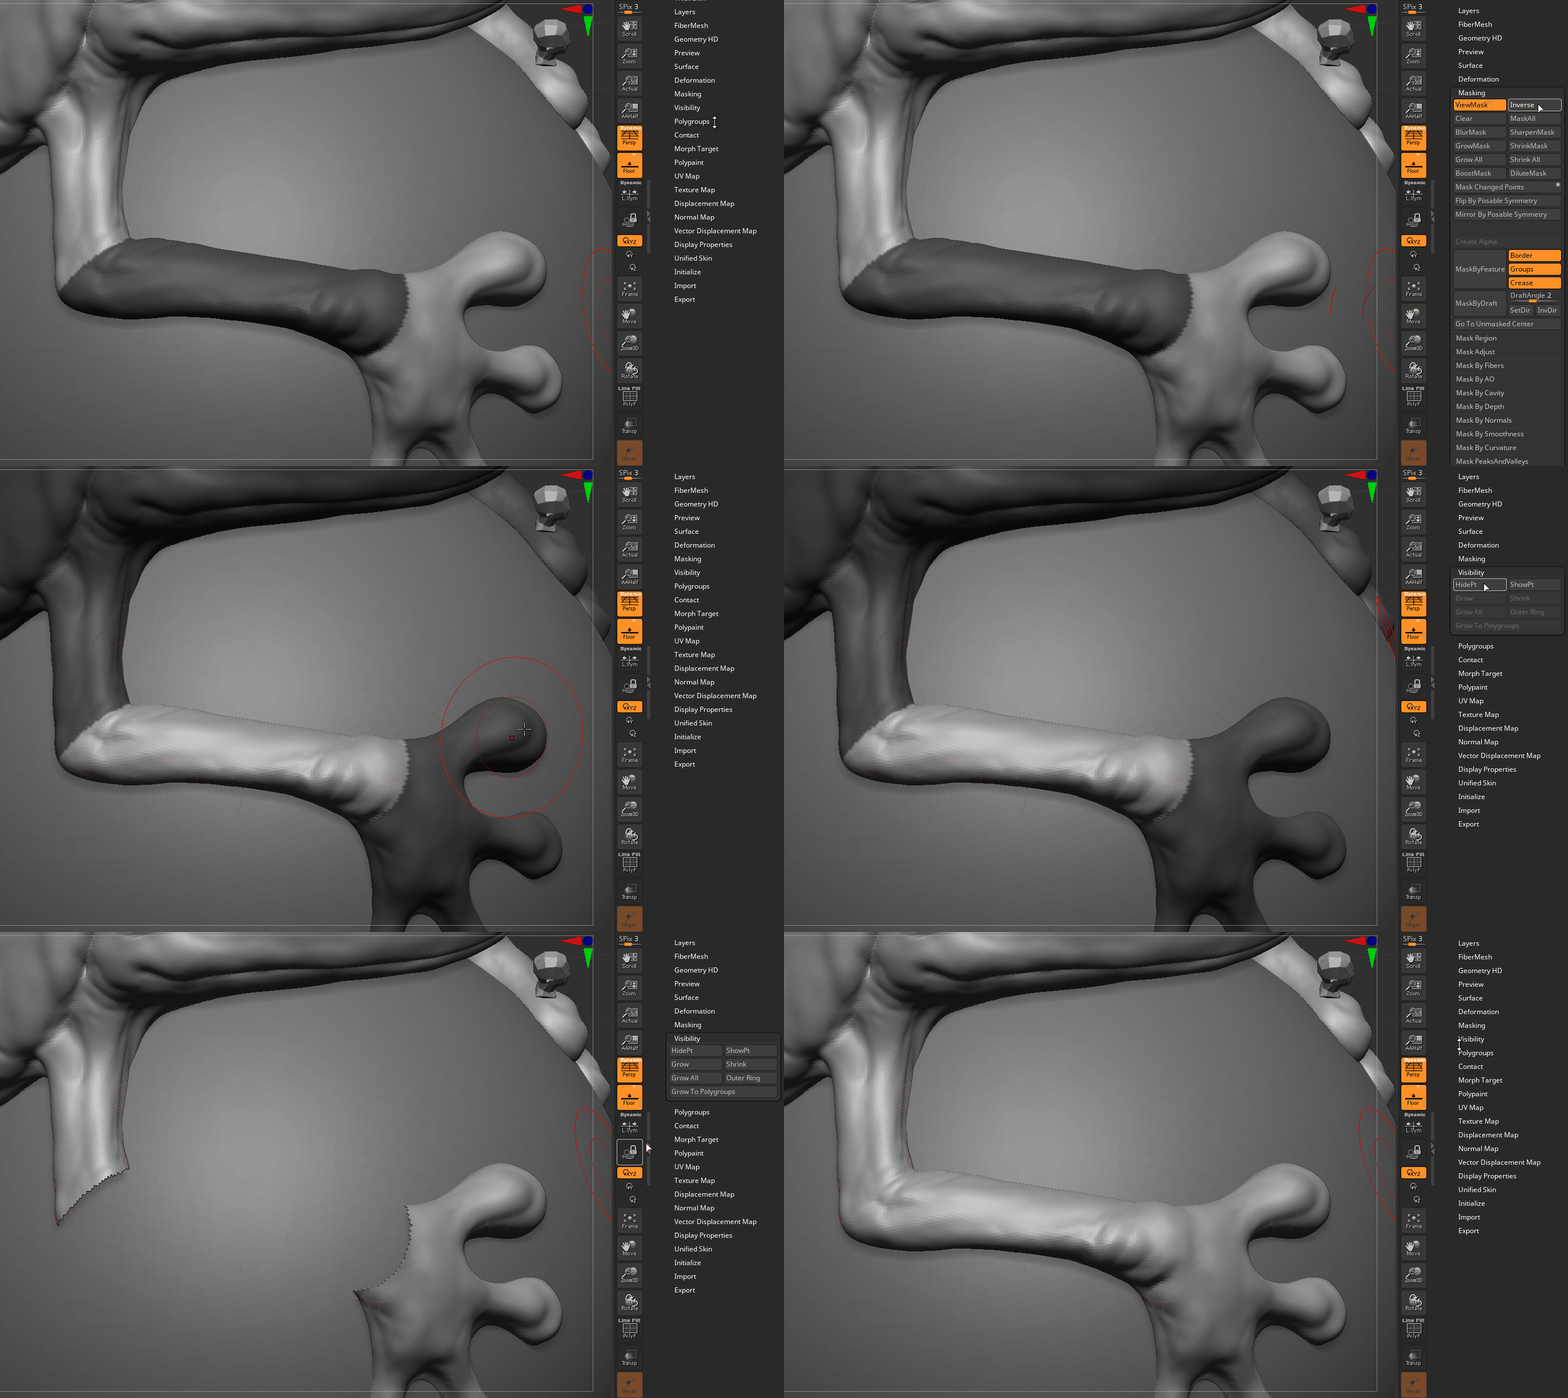
If we combine the two above steps, we can change what part of the model is hidden.
By default, the Toolbox buttons will hide the part of the model that is NOT masked. So if we invert the mask first, we can hide the other half.
Intro to Polygroups
Polygroups are preset groups on your sculpt to help organize the model.
For example, Polygroups can be used to quickly make a selection, separate different areas of the mesh, and even help clean up general topology.
Polygroups are directly linked to masking, because they're created from masks.
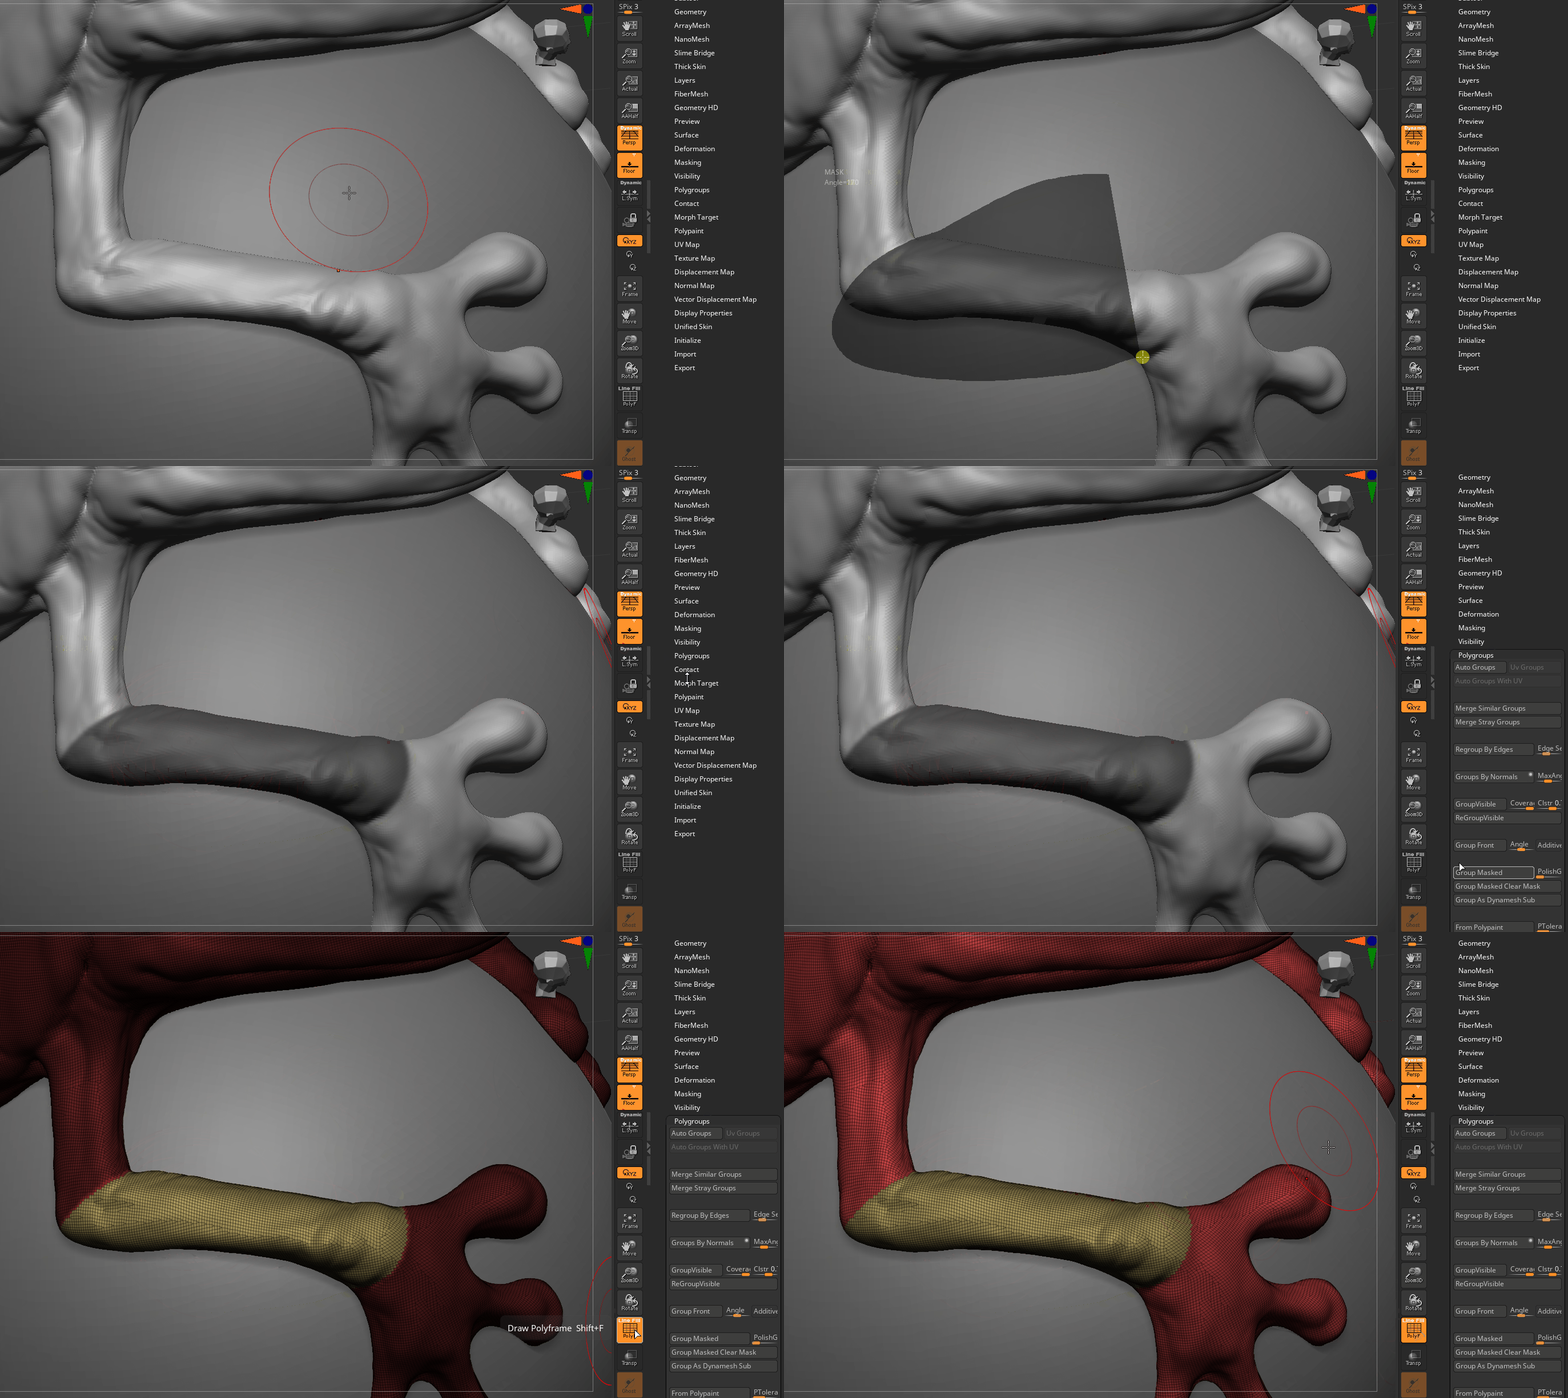
First, we need to create polygroups.
It's best if this is done on meaningful sections of geometry. In this example, I create a mask on the frog's forearm.
With the desired area masked, go to Toolbox > Polygroups > Group Masked.
Reminder to make sure polygroups are visible, or else it might not be clear what the button did.
If it worked correctly, then the masked area should now be a different color from the rest of the model.
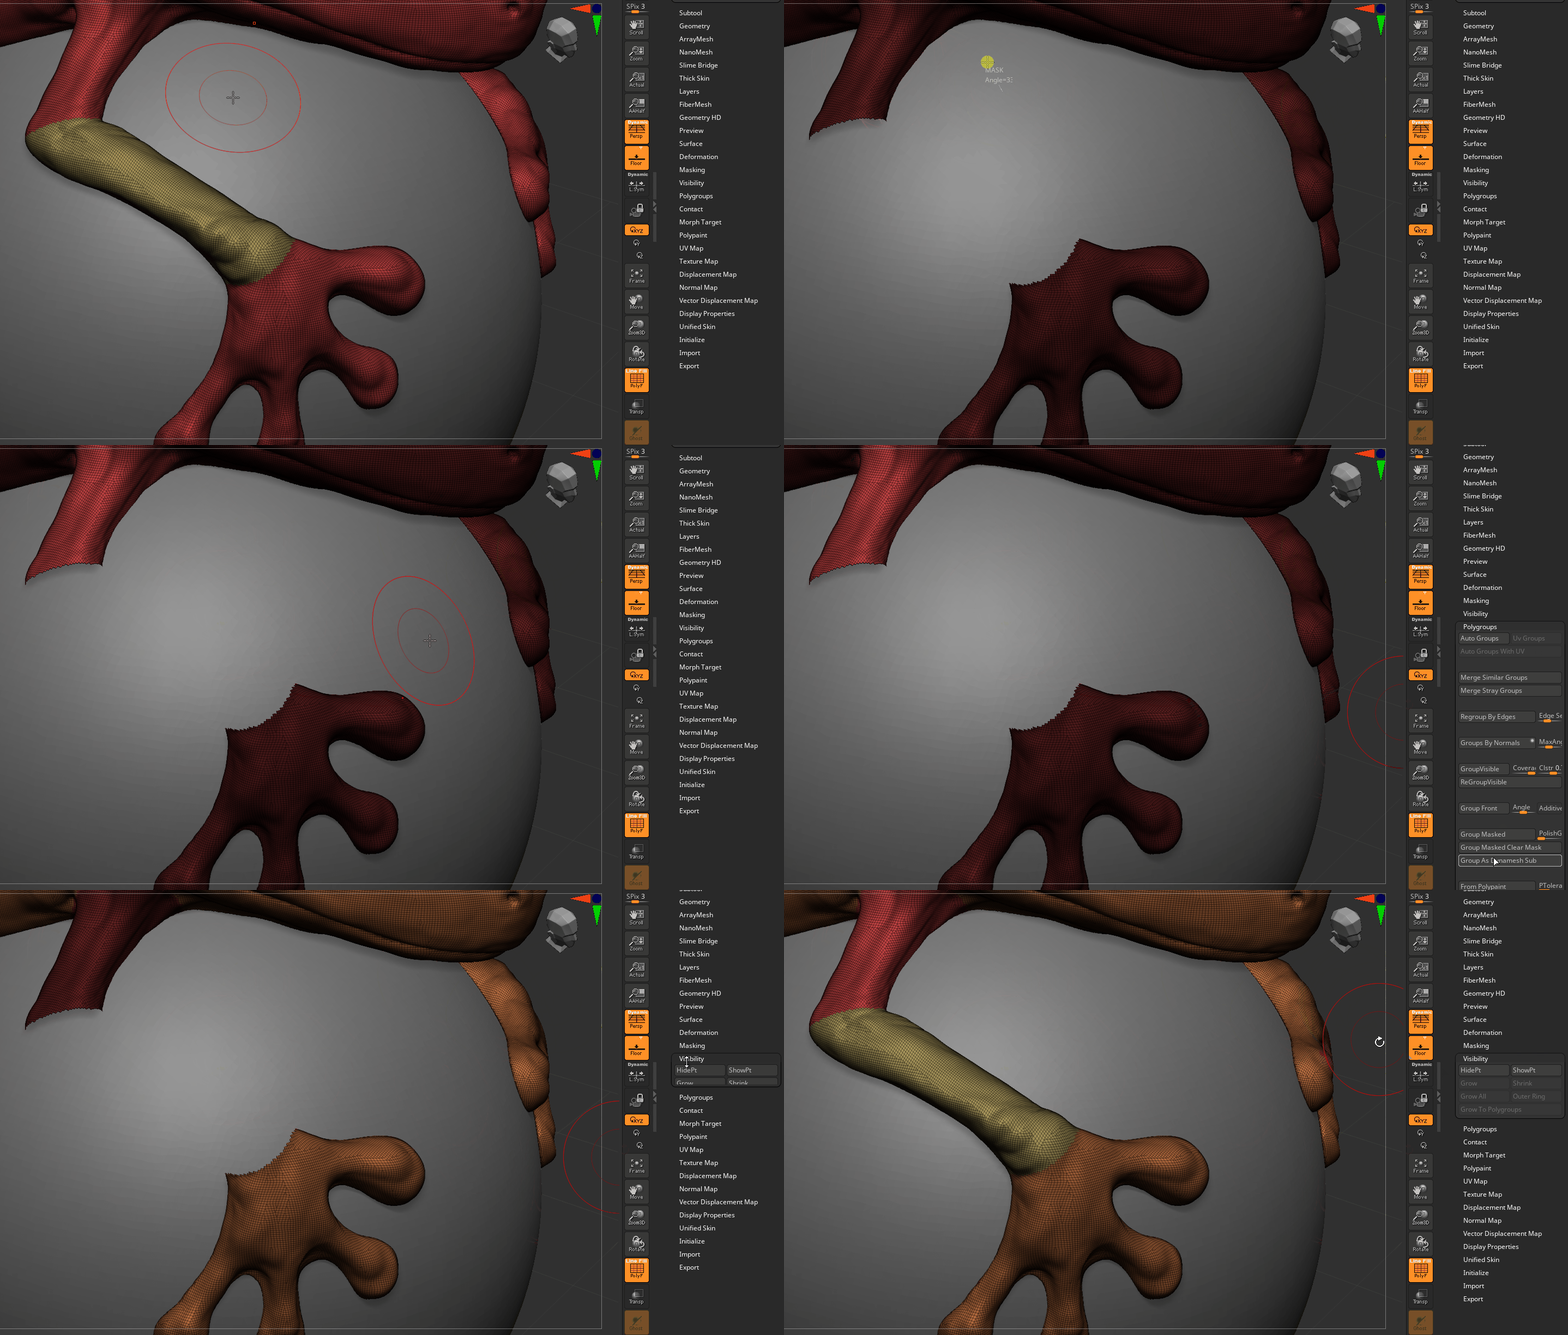
If you're not used to masking, then creating multiple polygroups can be tricky. Reminder from zBrush Polygroup Actions that we can isolate a polygroup. Then with zBrush Mask Actions, we can either add to mask or remove from mask, as needed.
In this example, we isolate the polygroup (Ctrl + Shift + Left Click). Then we Ctrl + Click outside of the model to mask everything visible.
Next, we use Ctrl + Alt + Click to remove the upper arm area from the mask.
When content, we can create another Polygroup via Toolbox > Polygroups > Group Masked.
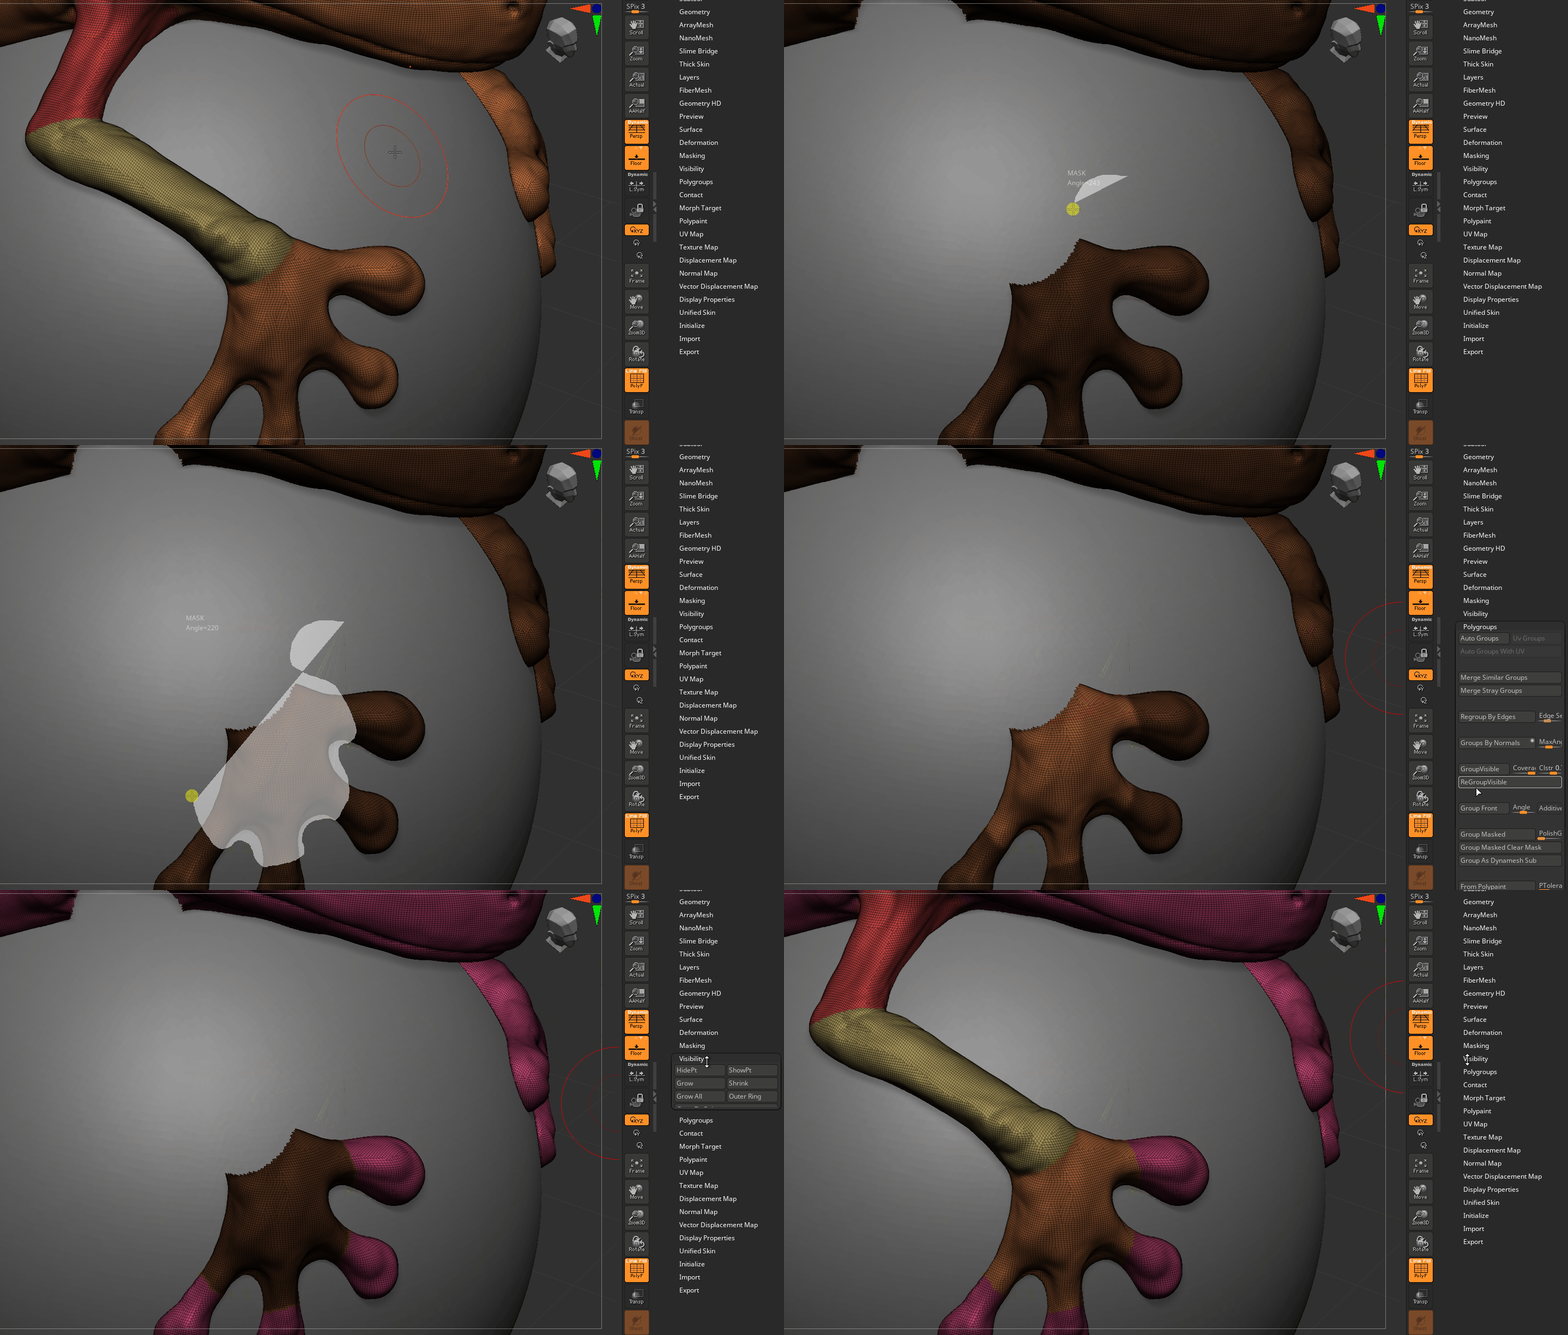
Here, we keep going with the same process, creating additional masking for the fingers.
In theory, we can keep repeating this, until all the desired areas are split into polygroups.
Cleaning Topology with Polygroups & zRemesher
Using zBrush can be a balancing act sometimes.
The more subdivided your mesh is, the more detail it can contain. But at the same time, more topology can make the mesh harder to work with too.
When working with larger forms, at some point you'll probably want to "clean up" your topology, to be able to easier manipulate it later in detail stages.
One method to accomplish this is through the combination of Polygroups and zRemeshing, as shown below.
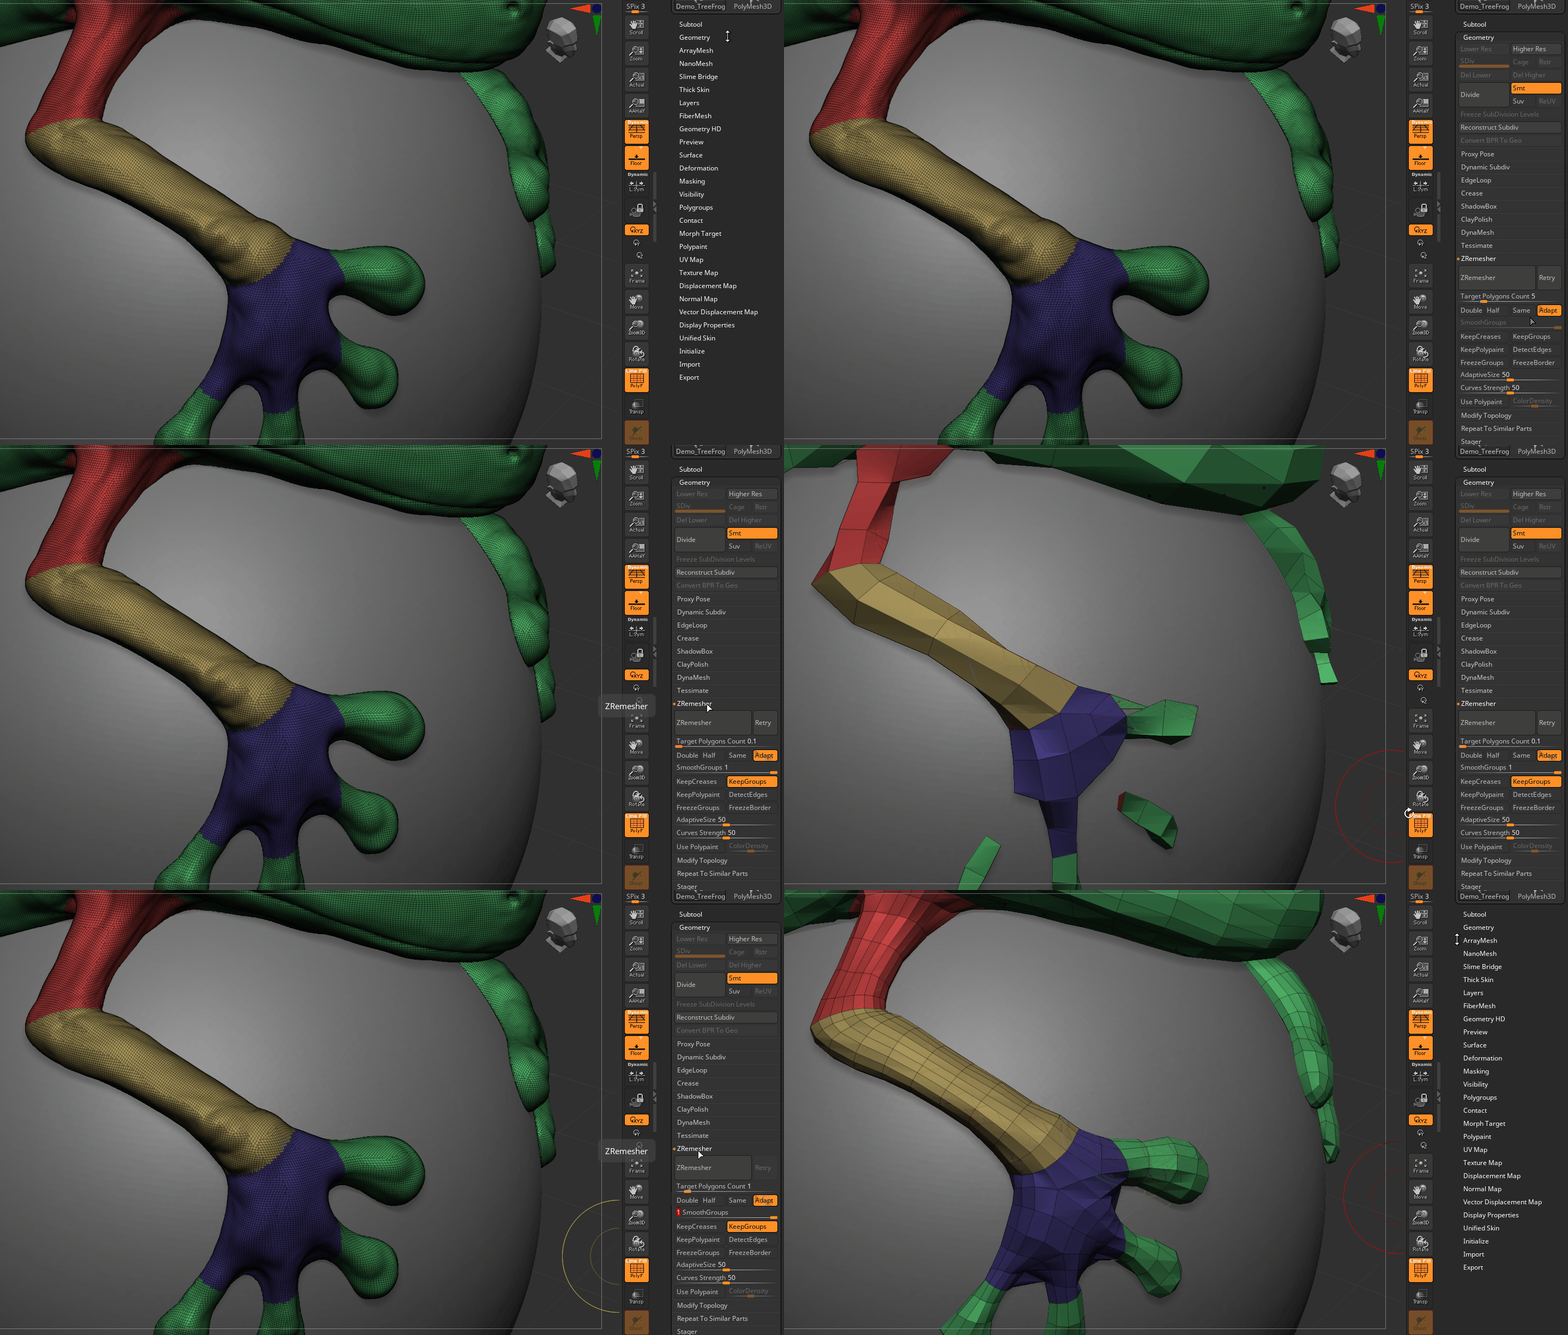
First, we divide our mesh into as many polygroups as we desire.
Generally, we want to divide all of our "major sections" into one polygroup each.
zRemesher will try to use these polygroups to create edge lines in our topology.
We may not get lines that are quite "animation ready" by this method, but it will definitely be closer, and will make further detail easier for some brushes, as they won't have to fight against pre-existing topology flow.
(For more information on what "topology" is and why it matters, see Topology)
Once content with our polygroups, we can use the zRemesher tool, found in the Toolbox under Geometry > zRemesher.
There are two settings here that are important:
-
Target Polygons Count - This tells zRemesher how detailed to try to make the resulting topology.
Ideally, we want it as low as possible, without loosing detail. Reminder: As a general rule, simpler our topology, the easier it is to work with it.Start with a really low value, such as 0.1. If the detail is too low at first (as shown in the example), raise it to 1 and try again. Keep raising it until it ends up looking good for what you desire.
-
KeepGroups - This is a checkbox that is either on or off.
If it's highlighted, it's on, and tells zRemesher to account for Polygroups when it runs. We definitely want this on.
Once settings are toggled as desired, hit the "zRemesher" button to activate it.
If it looks wrong, ctrl + z to undo, tweak settings, and try again.
Known Issues
If you run into a "ERROR: Remeshing error encountered. Remeshing aborted." when trying to zRemesh, then you probably have holes in your model somewhere. See Fixing Sculpting Holes for steps on how to correct this.