zBrush - User Interface
Using and Customizing the Interface
Starting a New Project
The following are the steps to start sculpting in a new zBrush project.
Setting Up the Workspace
Hit the comma key to hide the lightbox. We can hit comma again to bring it back up.
By default, the draw window is usually not full screen size.
To fix this, go to the Main Toolbar (at the top) > Document > New Document.
Now we're ready to create an object.
Creating a Sculpting Object
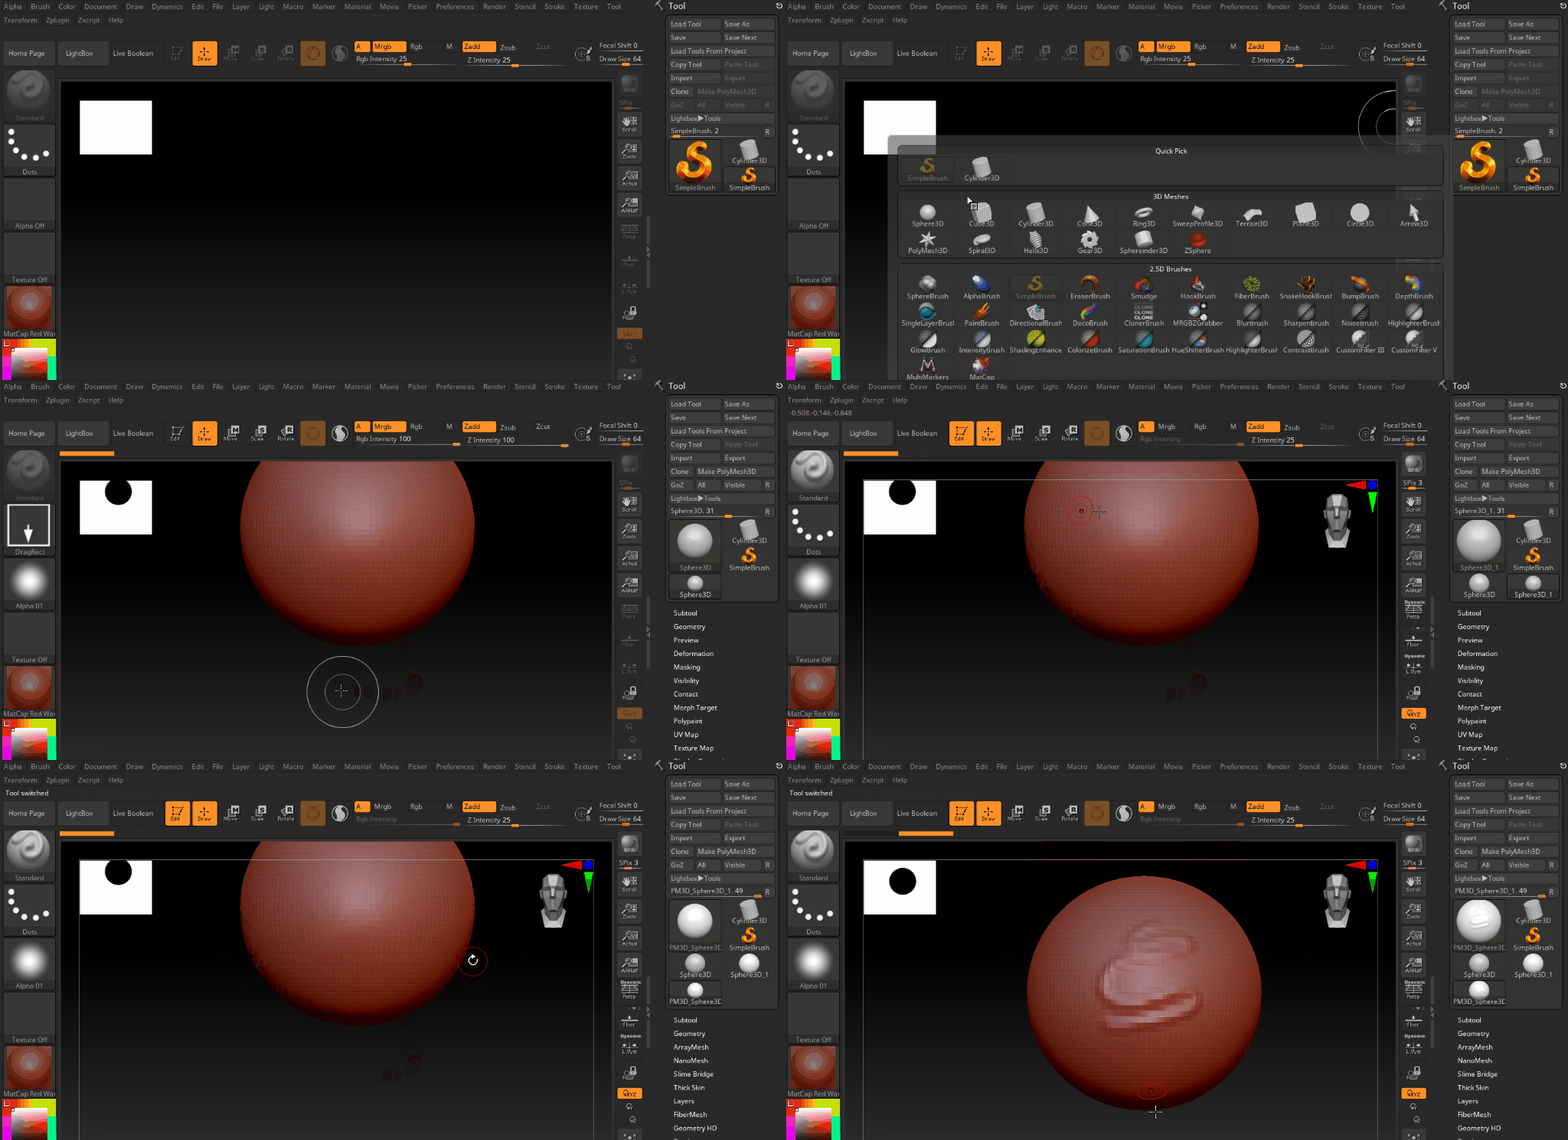
As shown above, to create an object we:
In the "Toolbox" (right hand side), click "Tool" and change to Sphere.
Click and drag to create a new sphere object in the viewport.
In the "Top Shelf" (right above viewport), click "Edit" to go into edit mode.
-
Back in the "Toolbox", click the button for "Make PolyMesh3D" to mark your sphere as editable.
If it worked correctly, you should now be able to left click to draw on your sphere! Or right click to rotate the camera around the sphere.
Known Issues
If you have multiple spheres in your window, or zBrush won't let you draw directly on the sphere, then you probably clicked off of the sphere at some point. Order of clicks matters to some extent here.
The easiest way to fix this is to regenerate your document, done by going to Main Toolbar (at the top) > Document > New Document.
With a clean slate, try doing all the above steps once again.
Customizing Interface Panels
The zBrush interface can be customized.
A common way is by opening a dropdown menu, clicking the circular icon at the top,
and dragging to the desired location.
This will "tear" the menu out of the dropdowns, docking it at the location it was dragged to.
It's also possible to grab commonly used individual brushes and actions and dock those specifically, as shown below.
To enable customization, go to Preferences > Config > Enable Customize.
When finished, you can disable customization with the same button.
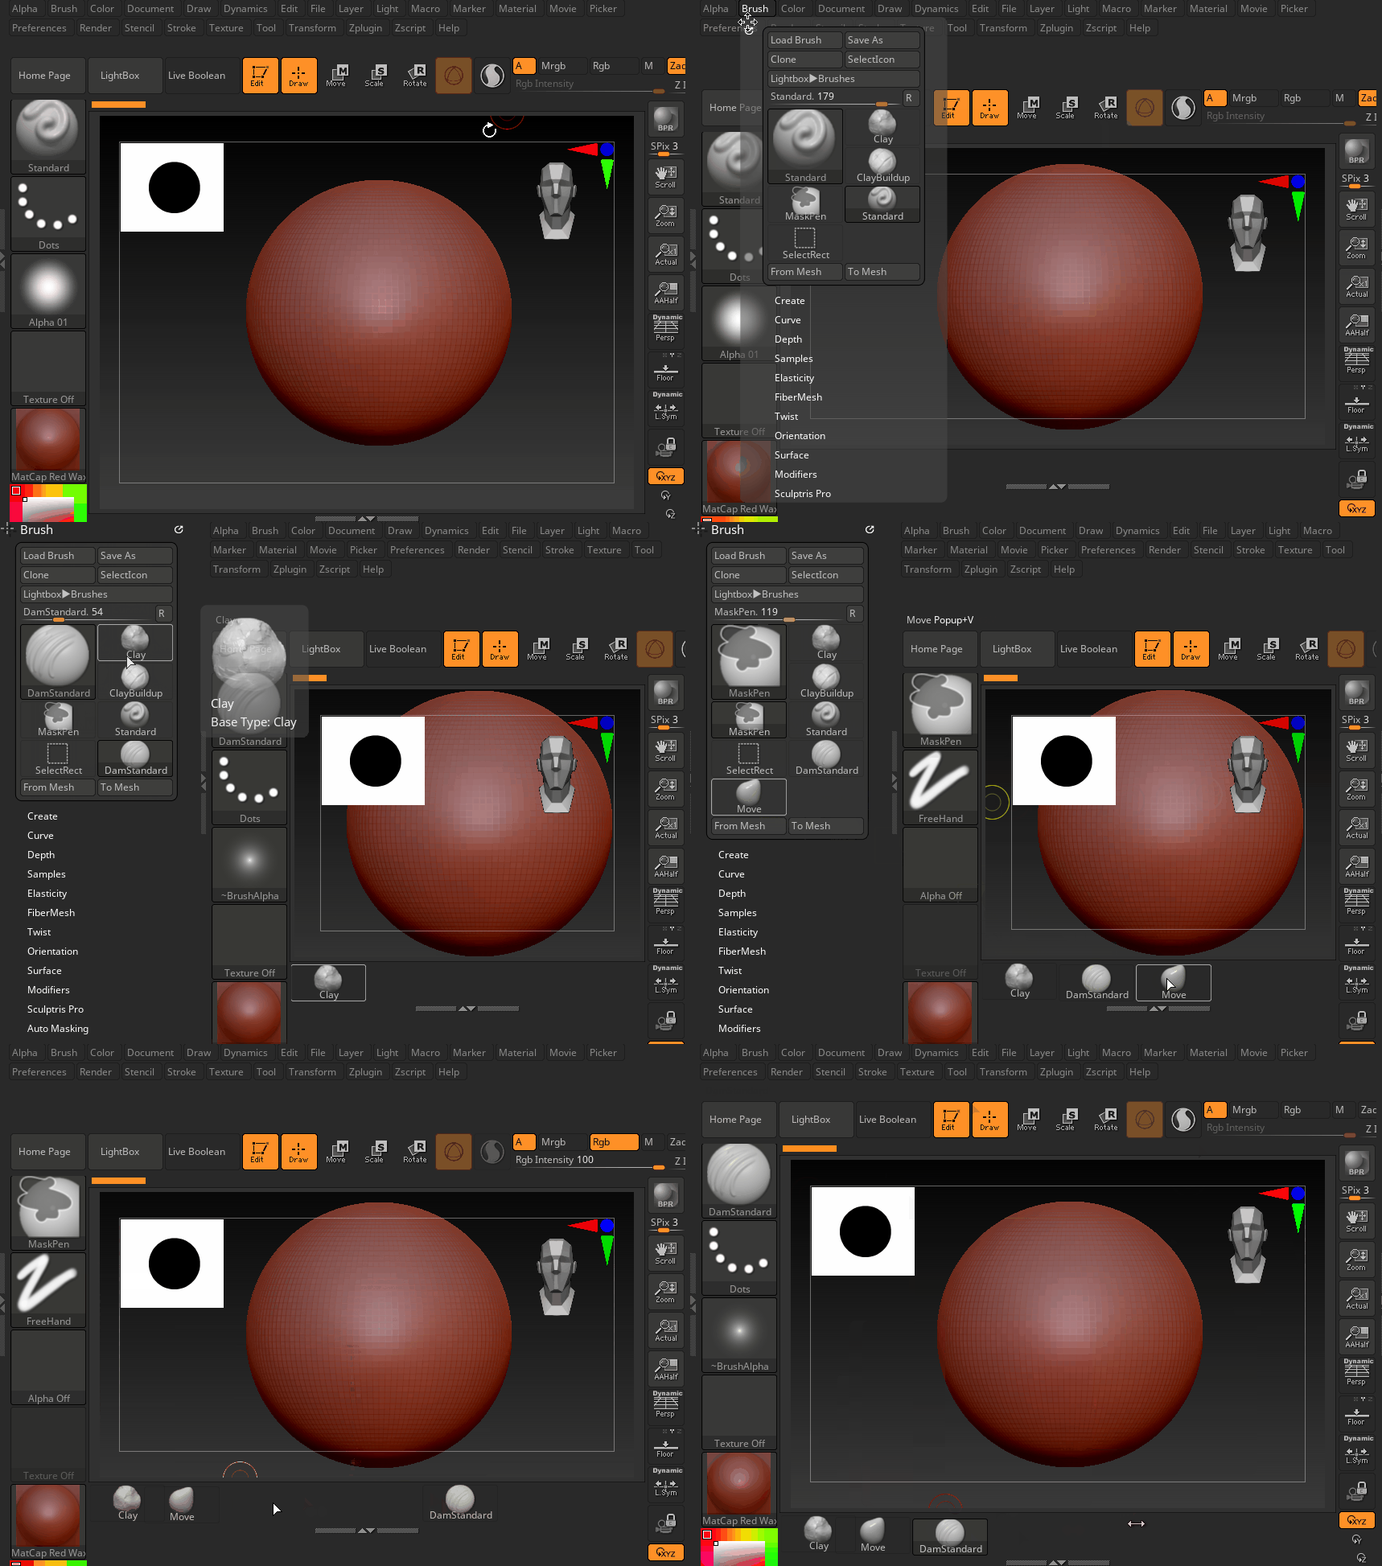
With a menu that's been docked, we can grab individual actions and drag them around.
We can move and arrange these in the bottom section.
When finished, to hide the "torn out" menu, click the double arrows at the edge of the bar.
NOTE: Reminder that this does NOT work with docked menus.
Nor does it work with sub-menus.
Make sure the items you want are fully docked in the main interface before trying.
Customizing Model Materials
It's possible to customize the material on the scuplting model as well.
Changing the material can sometimes help see the form of the sculpt better, by changing how the lighting, color, and reflection affect the model.
The material options are on the left hand side of the screen, under the brush and alpha boxes.
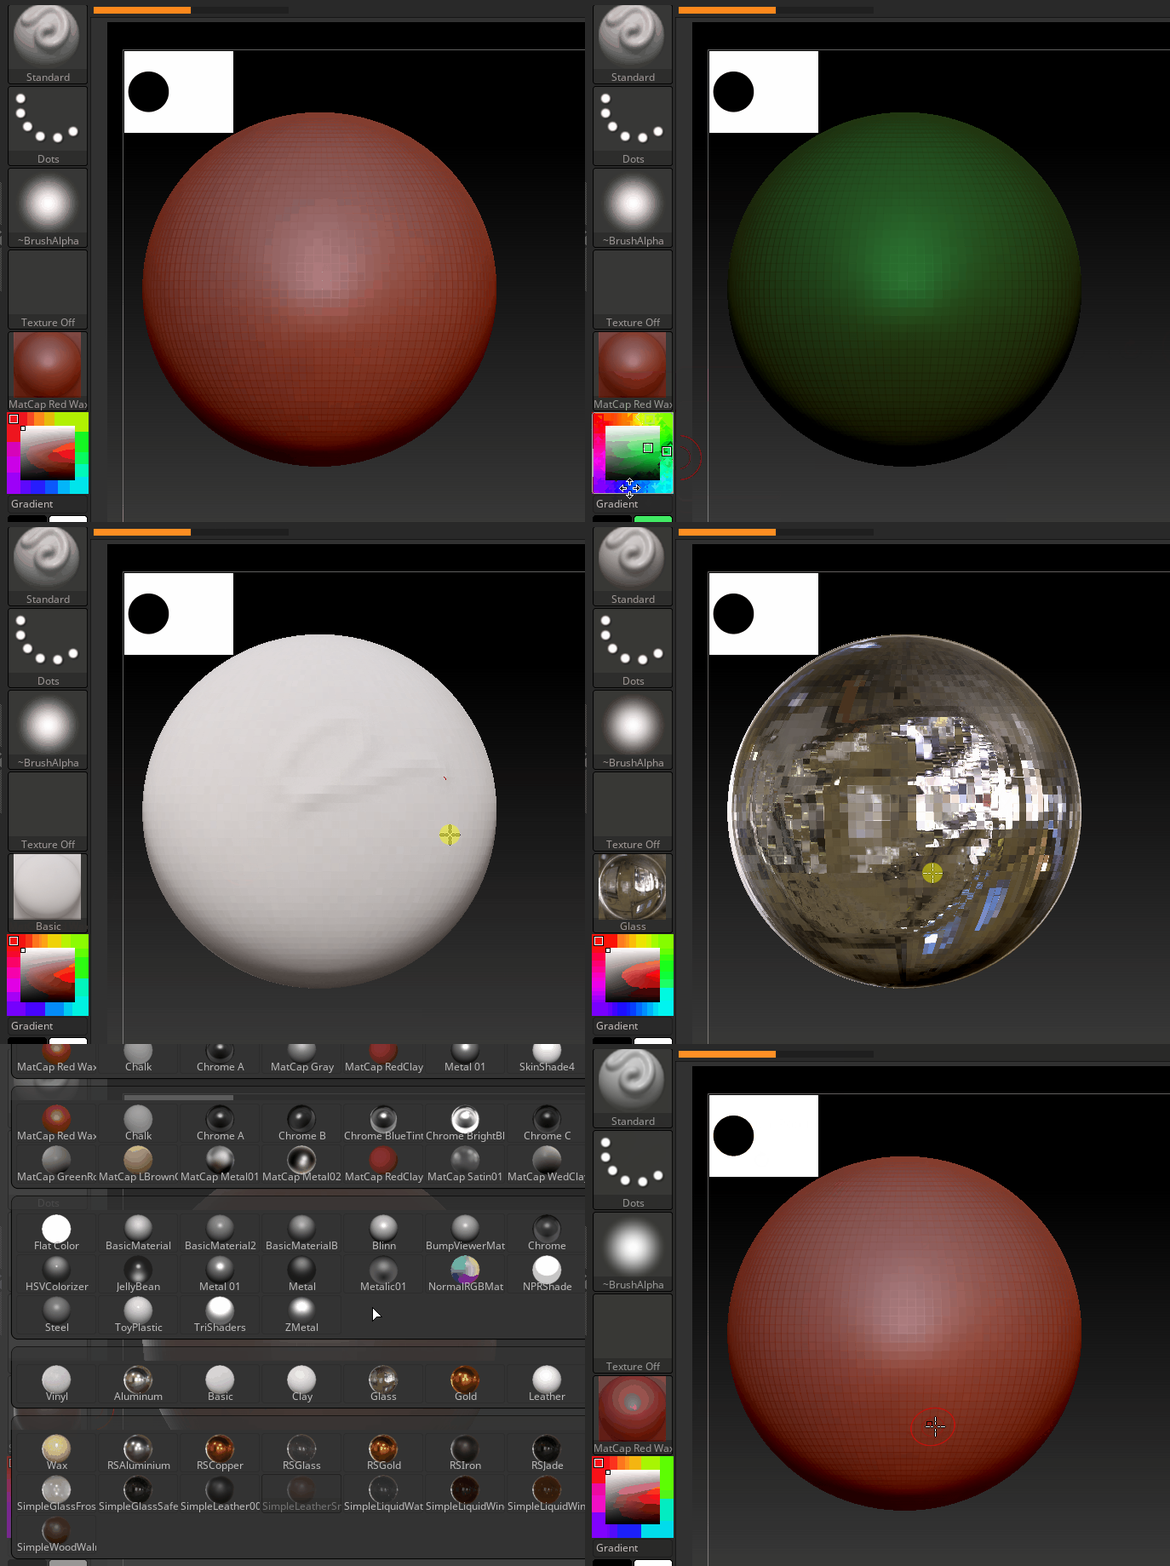
To change the color, use the square "Gradient" box. The outer values control the hue. The inner box controls the brightness and saturation.
To change to a different material type, click the "Material" box. Then in the new window, select the desired option.
Default Material: MatCatp Red Wax
-
Suggested Options: Either the "BasicMaterial" options or the "SkinMaterial" options.
Displaying Model Topology (Polyframe)
Sometimes it's useful to see your model topology, either to gauge how "clean" your sculpt is, or to gauge how dense the mesh is.
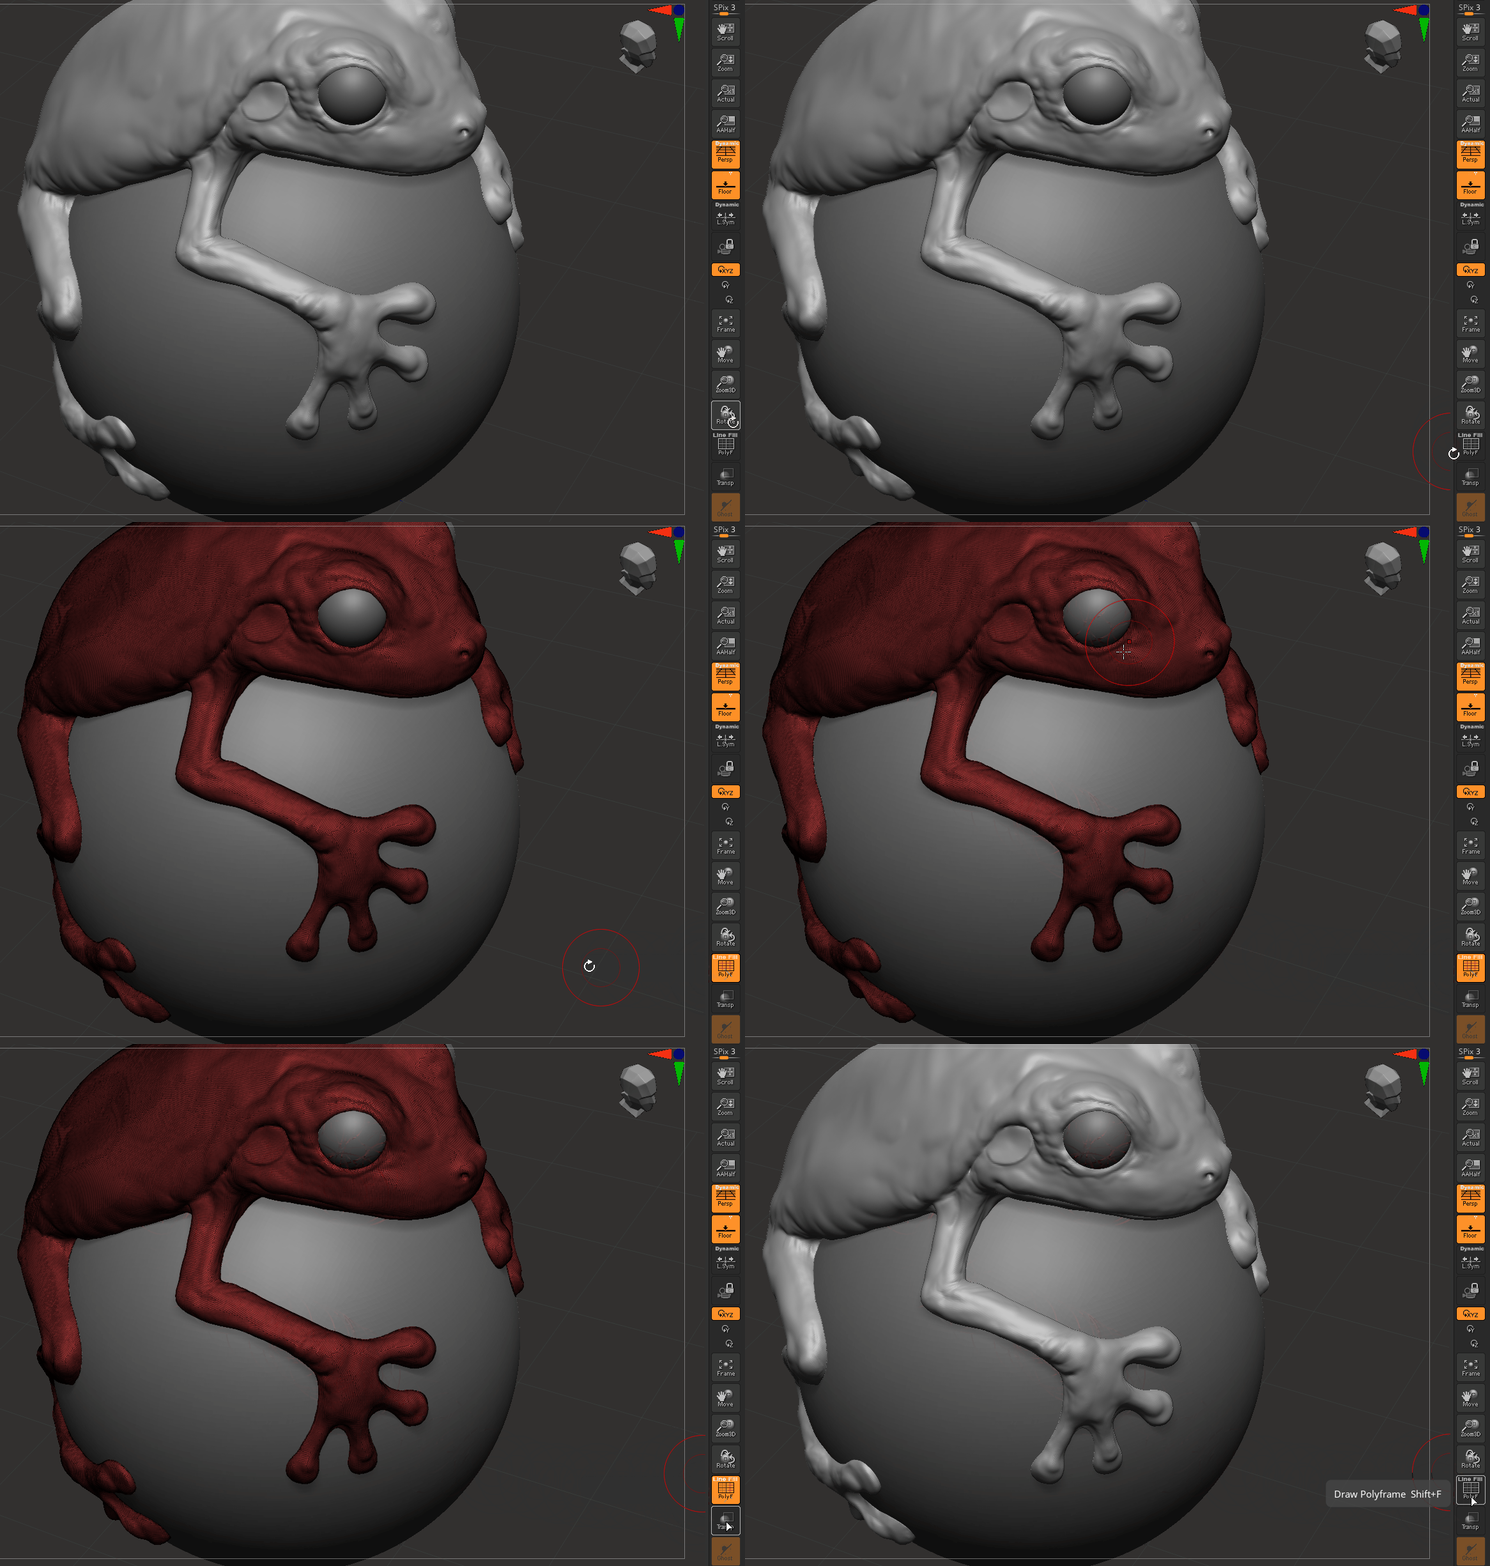
To toggle topology, click the button on the right toolbar.
If you have a small screen, you might need to Ctrl + Left Click drag on an empty space to move
the toolbar up.
Alternatively, you can go to the Main Menu Transform dropdown to find the Polyframe options.