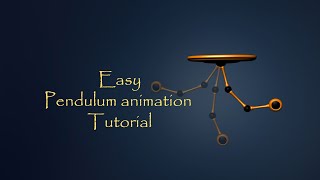
3D Animation - Pendulum Assignment
Level 2 Pendulum
Level 2 Pendulum - Animating a Moving Pendulum in 3D
Before starting this exercise, we highly recommend you've done the Level 1 Pendulum assignment, as well as the Bouncing Ball assignment.
This page will walk us through how to make an infinitely looping pendulum that moves forward, and then back again, over and over, and the arm swings accordingly. This loop will happen over the span of 2 seconds (48 frames total).
Step 1: First Keyframes
Reminder that in this example, we're going to make an infinitely looping pendulum that goes moves forward,
and then back again, over and over.
For initial setup, I set my timeline editor so that we are only looking at the first 48 frames,
aka two seconds of animation.
Once the timeline editor is set, we start by making exactly three keyframes total. For these keyframes, we want to move the main body of our pendulum. We're not touching the arm controls quite yet.
To do this, we grab the top control and:
-
Saved a new keyfame at frame 1, our first frame. This can be at our default, starting location.
-
We can then work on frame 24 (our middle point). We can move our object to the farthest point it will travel, and set another keyframe here.
-
Finally, we can go to our last frame (frame 48), and keyframe our object being back at the start location.
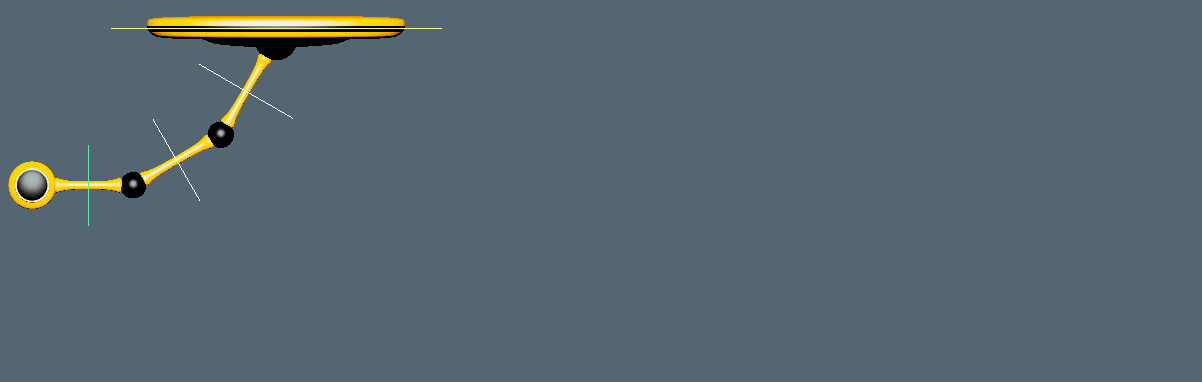
If done correctly, it should look something like below.

Step 2: Creating the Main Poses
At this point, our animation moves the overall pendulum object.
But our pendulum arm is static and unmoving.
We can fix that by now creating our "main poses".
Reminder that these will be our "most extreme poses" for our animation. In the case of this example, we get this whenever our pendulum changes direction and momentum.
So we can grab the controls for the arm segments, one by one, keyframing each adjustment before moving on.
Once again, at this point we want to keep it simple.
So each arm segment should have no more than 3 keyframes total.
For simplicity, I put mine at frames 1, 24, and 48, the same as our original
keyframes to move the object back and forth.
Below, we can see the desired effect at this stage. The top image includes our software's automatic "inbetweening", and the bottom image is with the inbetween frames temporarily turned off.
Both are provided, because the top one is likely what you'll see right now, but the bottom one may provide more clarity in what's actually going on.

Again, keep it simple. If you have a bunch of keyframes all over the place at this point, then you might want to delete some of them! We should only need 3 frames total (per control) to achieve our desired effect.
Step 3: Correcting Our Timing
Right now, our timing looks wrong.
On the extreme left or right positions, our pendulum arm appears to be facing the correct direction. But once the main body reaches roughly the middle, the arm is already transitioning to the next pose! This isn't correct.
In this case, we want our pendulum arm to "hold" the pose until the main body begins to lose momentum.
We can do this very easily by copying our poses and pasting it farther down our timeline. This results in two keyframes with identical poses, and no other keyframes in-between them.
This makes our software "hold" the pose for however many frames are between. Which is exactly what we want in this instance!
Once done, we should now have something that looks like below.

Step 4: Correcting Momentum
At this point, we have the main idea for our pendulum, but the details could use some work.
For one thing, our arm swings way too fast.
End of Prior Step:
Depending on where you put your keyframes, yours might differ, and you will have to adjust accordingly. However, in the case depicted, the arm starts moving at roughly the correct time. But it should probably take longer to get to the end destination.
So I moved the "original 3 keyframes" over by roughly 5 frames. That gives us a result like below.
End of This Step:

Step 5: Adding Follow-Through
At this point, our animation is most of the way there. But there's still one extremely glaring flaw that any expert animator will immediately spot.
Specifically, our animation is very stiff and robotic.
Just as we did in the
Level 1 Pendulum assignment,
we want to delay our segments to make it more fluid.
The end result should look something like below.

Step 6: Correcting the Loop
Finally, after all that, we're close to done.
But notice how our loop, once again, looks broken and jumpy? How it "snags" or "jumps" at the very end, right before the loop restarts?
The solution is the same as what we did in the Level 1 Pendulum assignment, where basically you want the first and last frames to match better.
And reminder that if you're struggling with the loop, you can place a "cheat" keyframe right before your first frame, and another "cheat" keyframe right after your last keyframe.
That is, in this example goes from frames 1 - 48, then we can place cheat keyframes at 0 and 49. Sometimes that helps give more leverage to get the loop as you want it.
In either case, our result should look like below.

Step 7: Adding Last Details
As a minor last step, we can make this even more fluid by adjusting our "movement poses."
Remember in Step 3, how we copied our "movement keyframe" so that it was static?
Well we can add some follow-through/overlapping action to that as well, to give a sense of wind causing drag as the arm travels through the air!

It's subtle, but notice how the "movement pose" doesn't look so stiff anymore.
Next Steps: Above and Beyond
You've completed the level 2 pendulum exercise. You should be proud of yourself for getting this far!
How does animation feel now? Starting to get the general idea?
If you haven't done it yet, you should definitely go do the
Bouncing Ball assignment now.
Once you've completed the Bouncing Ball as well, you're ready to deal with actual characters.
Go on to the
Flour Sack assignment.