Perforce - General Usage
Introduction to the "Substance Painter" Software
"Depots" Vs "Workspaces"
On the left middle panel, we have two tabs: Depot and Workspace. This distinction is important.
The Depot tab displays project files that are on the actual server, up in the cloud.
The Workspace tab displays project files that are on the local machine.
In other words, Depot shows files that everyone with project access can see and pull down to their local machine. Meanwhile, Workspace shows all files pulled from the server, as well as any new files or changes actively being worked on.
Selecting/Changing Workspaces
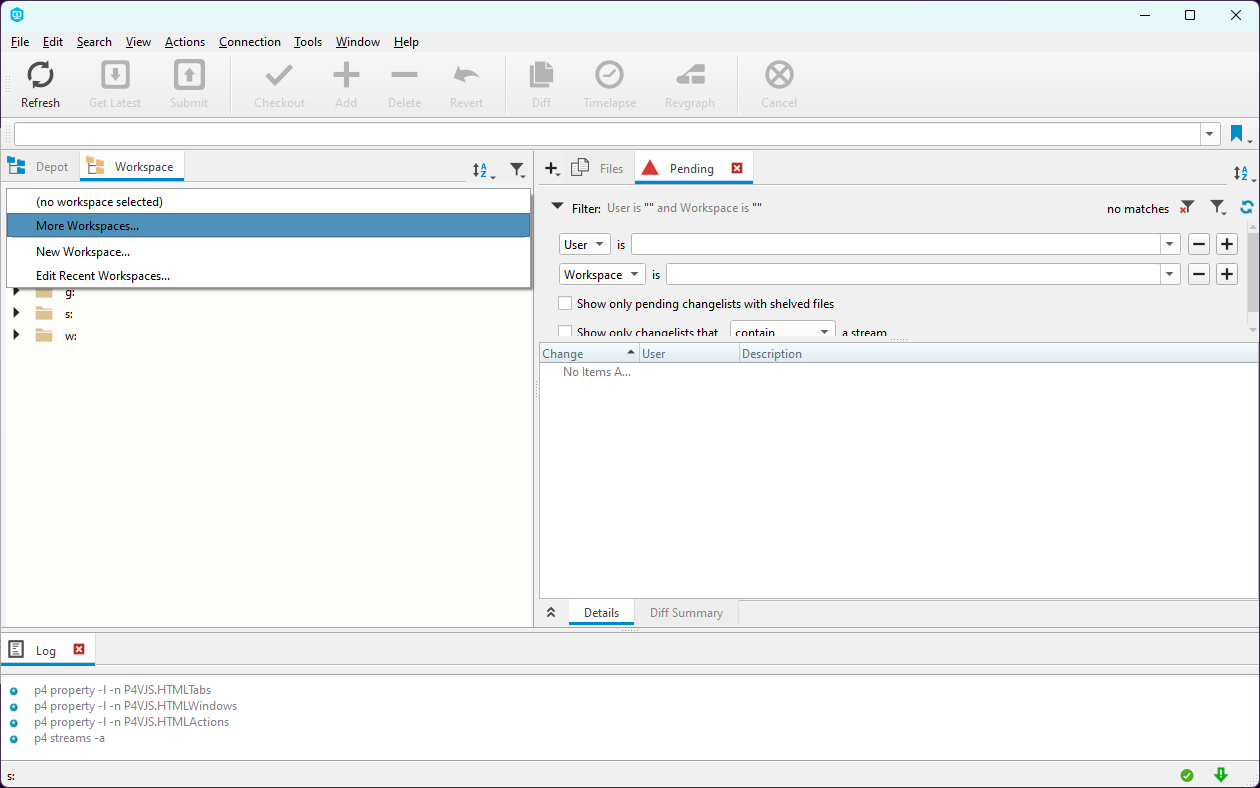
Depending on the options provided when you launch Perforce, it might launch without selecting a workspace.
Alternatively, if your server has multiple workspaces, you might need to change which workspace is currently active.
In either case, you can use the dropdown on the left (see below screenshot) and select "More Workspaces..." to activate the desired workspace.
Correcting the Workspace View (Middle Left Panel)
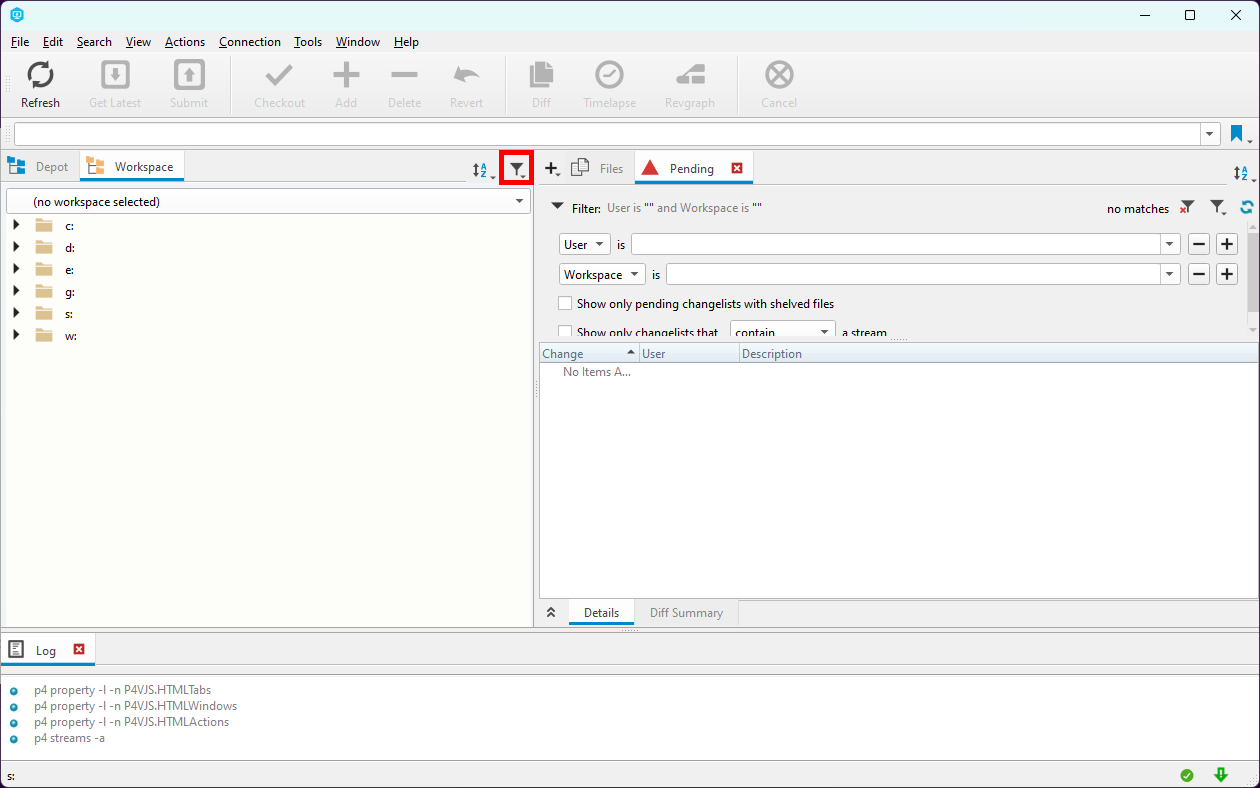
Sometimes, even when you're connected to a workspace, the panel on the left will still show your computer drives, instead of the actual project folders.
You can always navigate to the project location from this view. But usually it's easier to just fix it to display your project folders.
To do this, click the little triangular filter icon (highlighted in red, below).
From the dropdown men, select the below highlighted option labelled "Workspace Root."
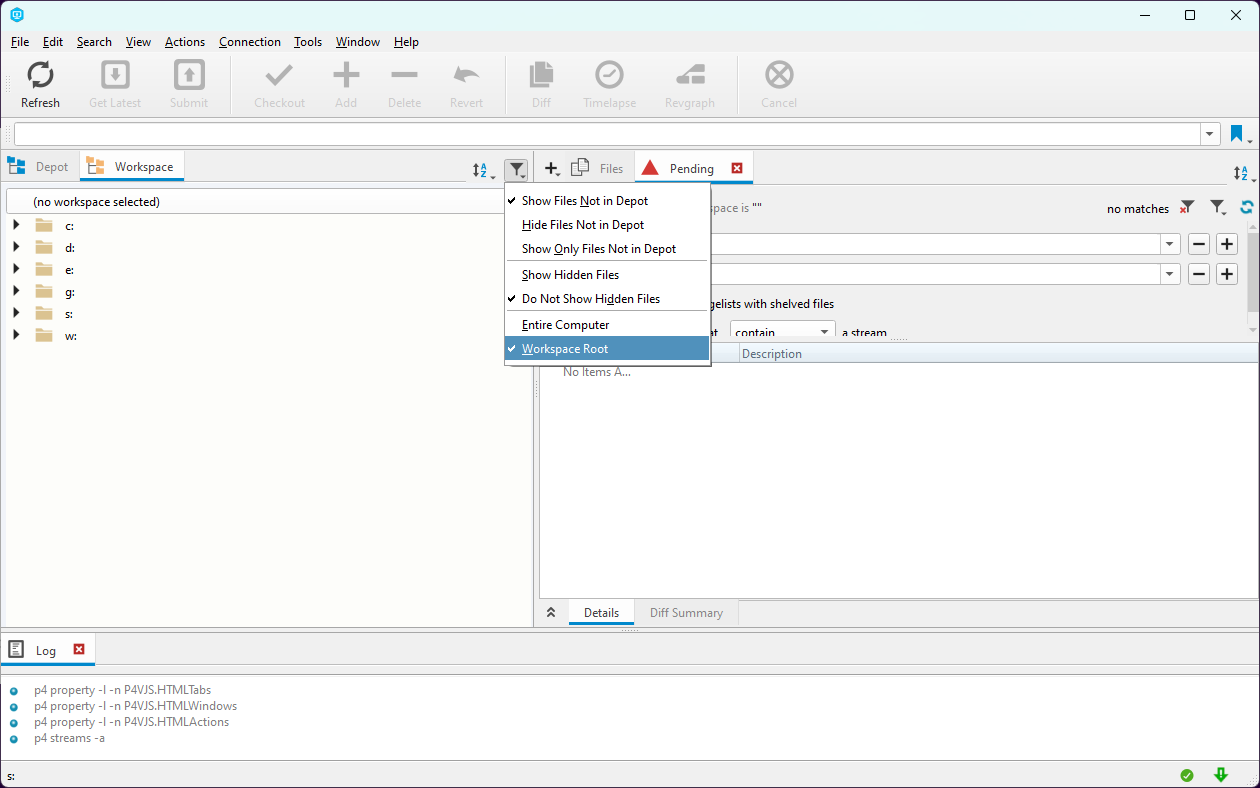
If it worked correctly, the middle-left panel should now display your project panels, making it much easier to navigate within your project.
Opening Views (Middle Right Panel)
The panel on the middle-right displays our various "views", and is gives us a lot of control in Perforce.
By default, only the "Files" and "Pending" tabs will be visible here.
However, we can open up many other panels with the "View" menu.
Alternatively, we can use the same menu to re-open these two default tabs, if we accidentally close them.
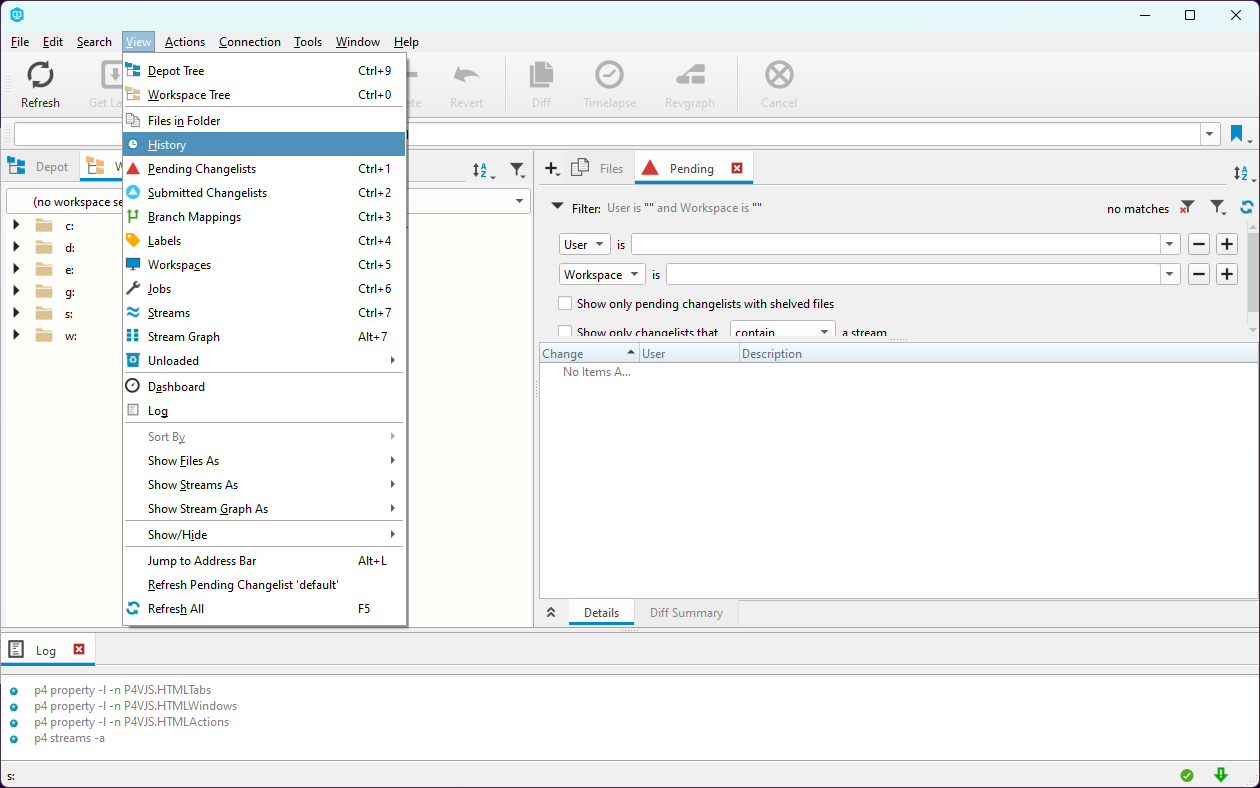
In the above image, we can use the View > History option to open up a panel that lets us see file history since the start of our Perforce project.
History is useful because it lets us see what has changed in previous commits, and go back to prior history if something is broken or otherwise not working correctly, but was previously.
Using the Primary Menu Buttons to Manage Our Project
Note: All of these buttons only affect files for the currently selected folder in your Workspace panel.
So if a button doesn't seem to be working, or isn't affecting all the files you want it to, double check that you selected correct project folder in your workspace. If you select the top-most folder of the project, it should affect all subfolders.
Conversely, if you want a button to only affect specific files or folders, you can select only those files or folders, and the button will ignore everything else.
"Get Latest" Button

This button pulls the most recent files that are available on the project Perforce server, up in the cloud.
It's generally a good idea to hit this any time you sit down at your machine, just to make sure your project files are up to date.
"Submit" Button

This button will take any changes saved to local history and sync it with the server, via pushing those changes to the cloud.
When you do this action, a new "commit" is created, which is a specific point in the project history. This commit documents all files and folders that were added, removed, or updated on the server.
Note: No files will be pushed to the server unless they are first "staged" by using the Add button. See below for details.
"Checkout" Button

This button marks the selected file (or if a folder is selected, all files within the folder) for local checkout on the current machine.
Reminder that Perforce is a "Centralized Version Control" system. Which means any file can only be edited by one person at a time. By "checking out" a file, you are telling the server you are intending to edit it, and no other machines can make changes to that file.
"Add" Button

This button marks the selected file or folder for "staging" in your workspace.
This means that Perforce first checks the selected file(s) to see if they've been added, updated, or otherwise somehow changed.
If the file is a new file, or has been updated in some way, then it is "staged" and thus put into the Pending view.
The point of "staging files" is to tell Perforce "Hello, I'm intending to make a new 'commit' soon, and push my changes up to the server by pressing the Submit button. I want to keep these file changes long term and save them on the server."
Note: None of these files are actually pushed to the server until you hit the Submit button. This only preps Perforce, telling it what files are going to be submitted when you eventually hit Submit.
"Delete" Button

This button "stages" files by marking them for removal from the server.
It functions very similarly to the Add button, only with file removal.
"Revert" Button

This button reverts files to the most recent prior state, as found on the server.
If the file is a new file that does not yet exist on the server, using this button will remove it from "staging," but otherwise leave the file as-is.
If the file is a file that already existed on the server, this button will attempt to remove any changes and revert the file back to the version that exists on the server.
If the file was marked for deletion, then this button will re-add the file to the local workspace and un-mark it for deletion.
"Diff" Button

This button shows the difference between a file locally, and the version on the server.
This can be useful if you want to verify work you have done prior to creating a new commit (aka, prior to submitting your work to the server).