Perforce - Setup
Setting Up Perforce on the Local Machine
Installing Perforce
Go to the Helix Visual Client (P4v) download page. If you're not sure of what options to select, then you probably want something similar to below.

Run the installer. If you haven't been told otherwise by your IT professional, then the defaults are probably fine.
NOTE: If using the defaults, you will likely get a popup about "default value likely needs to be updated." That's fine, don't worry about it. We can change this later, after first launch.
First Time Setup
Connecting to Your Server
Perforce will most likely install as "P4V" in the windows start menu. Upon opening the program, you'll likely see a window similar to below.

You'll need to contact your IT professional for exact connection details for your server. But generally speaking:
-
Server - The actual location on the web that the project files are being hosted at. The value for this likely looks like: ssl:example.com:1666
-
User - The username you have to log in on your server.
-
Workspace - An optional value that specifies a "workspace." On first launch, this should probably be blank, we populate this later.
If you get a pop-up asking about a character set, a good default is "UTF-8," which is should be at the very top. Alternatively, if your IT Professional told you to use a specific value, use that instead.
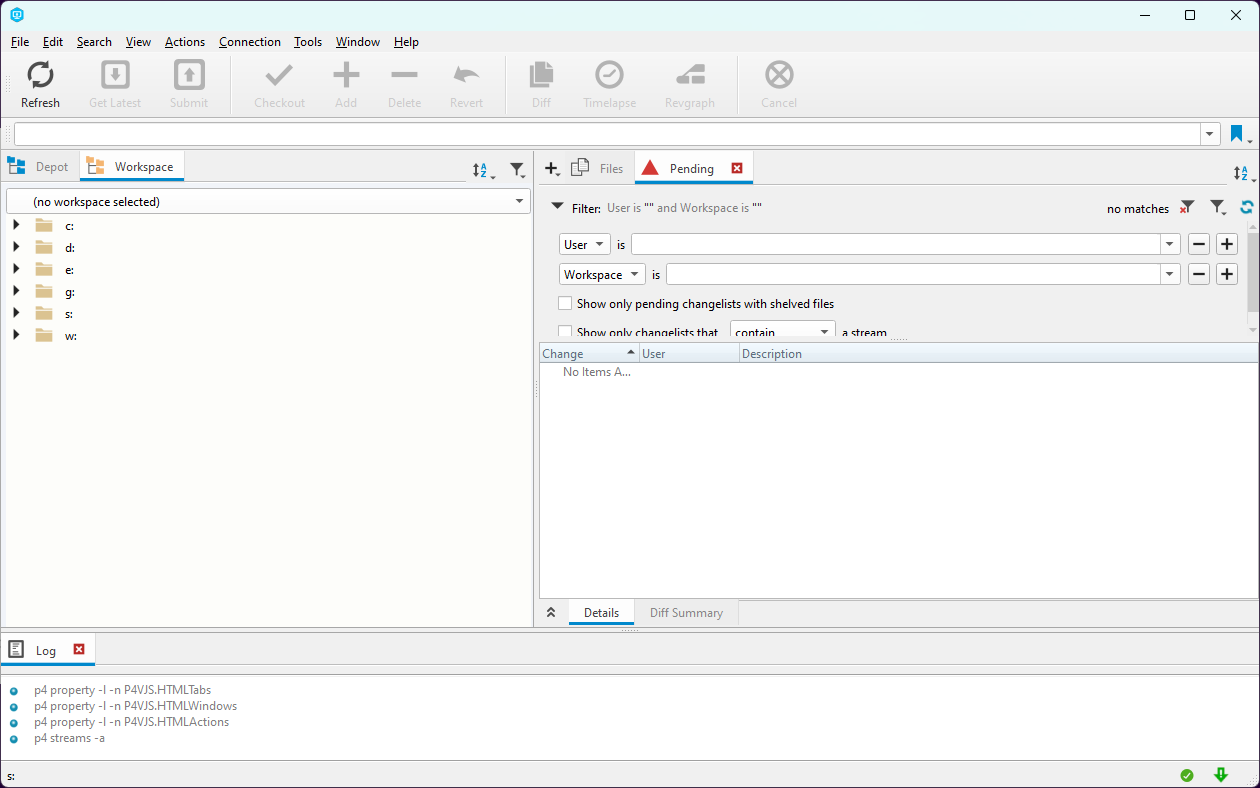
Once logged in, you should see an interface similar to the below image.

Creating/Accessing a Workspace
A "workspace" in perforce is an instance of the project files, pulled to a local machine.
If you connect to the server on multiple machines, you will need to use multiple workspaces, one for each machine. And each workspace name must be unique, so keep that in mind for later steps.
If this is your first time accessing the Perforce server from the current computer, you will need to create a new workspace.
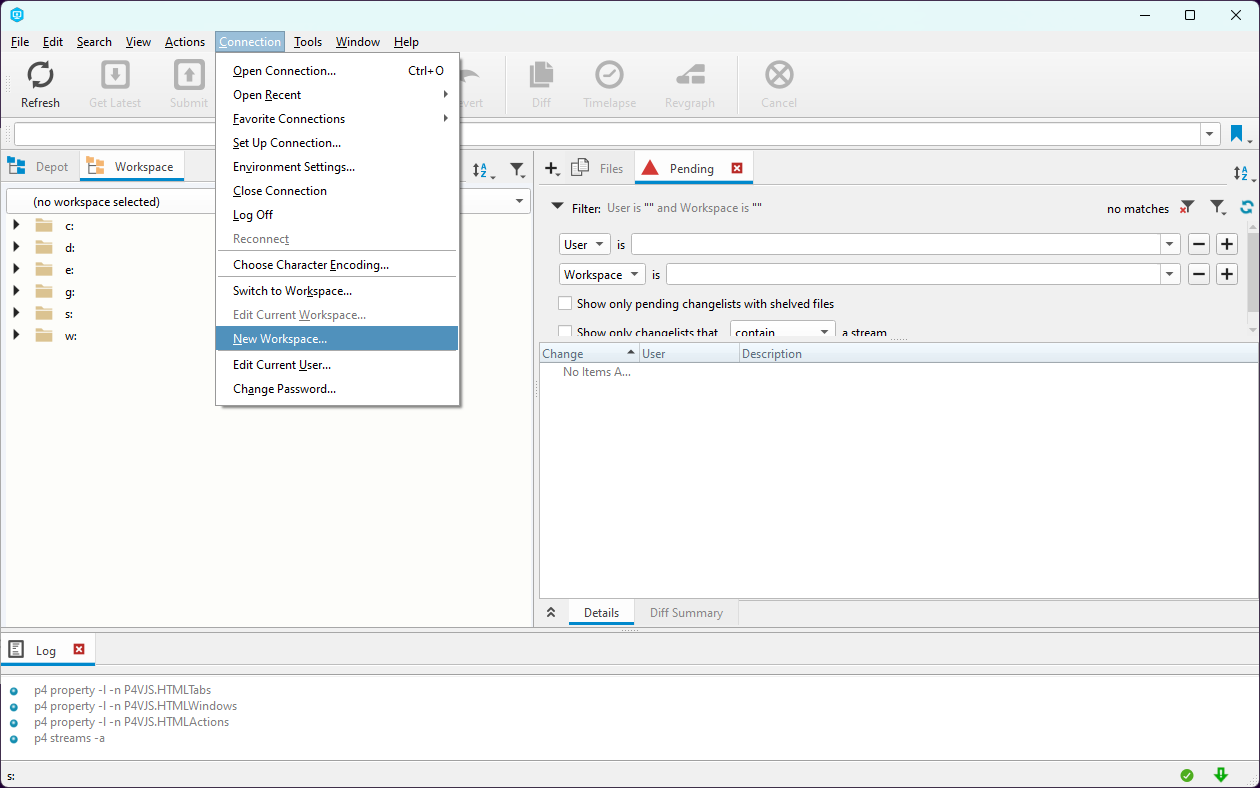
At the top menu bar, we can create a new workspace by going to Connection > New Workspace.

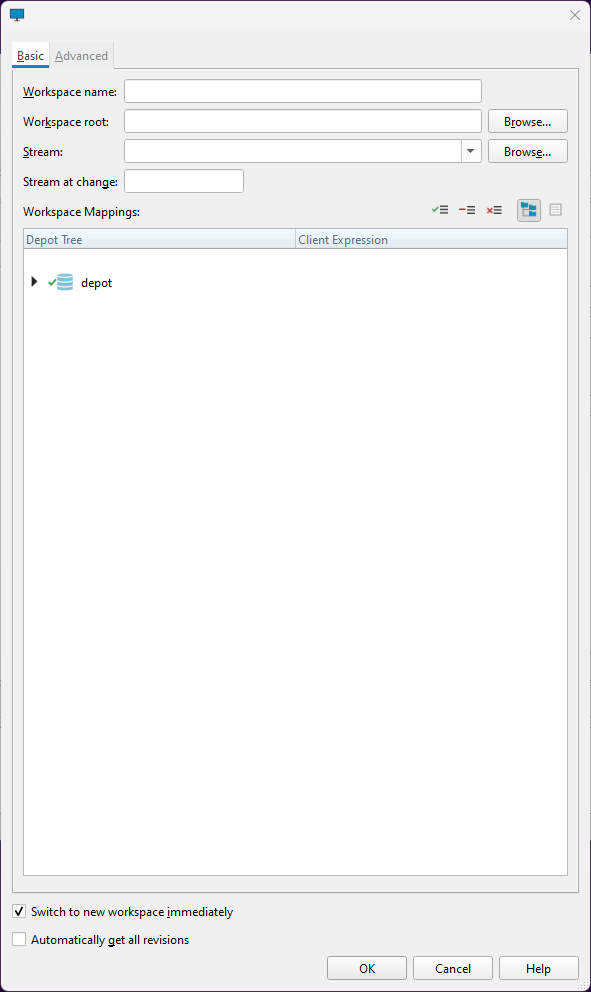
Then a new window will pop up, that shoudl look similar to below. We want to populate the following:
-
Workspace Name - The name to give the workspace you're creating.
This needs to be a unique value, no two workspace names can be the same. -
Workspace Root - The location on the local computer to save project files to.
You can save it anywhere you want, but try to make it somewhere you'll remember the location of. -
Stream - The "stream" on the server to pull data from. You probably specifically need to hit the "Browse..." button to populate this.
In smaller Perforce servers, there is probably only one value to select. In larger servers, your IT professional can tell you which one to use.

Once the above values are populated, you probably also want to check "Automatically get all revisions."